Getting started with Field Level Security in Dynamics 365
As a CRM System Administrator, you have many incredible, out-of-the-box configuration super powers in your toolkit. Today, I want to focus on one of these super powers: field level security.
Field level security gives you the ability to limit user groups who can read, create or update to a field. Here’s how that translates in the business world. In the following scenarios, adding Field Level Security can meet these business and user requirements:
- Your organization has an approval process. Sales reps enter data into a Quote, then a special team of Approvers has the ability to add data in fields. Sales reps should only be able to view this data – never edit it.
- Your organization stores confidential customer information in CRM. Only certain user types should be able to read and edit that data. All other users should never be able to see it.
In all of these cases, using simple out-of-the-box field level security can answer these requirements!
There are three steps to set up field level security:
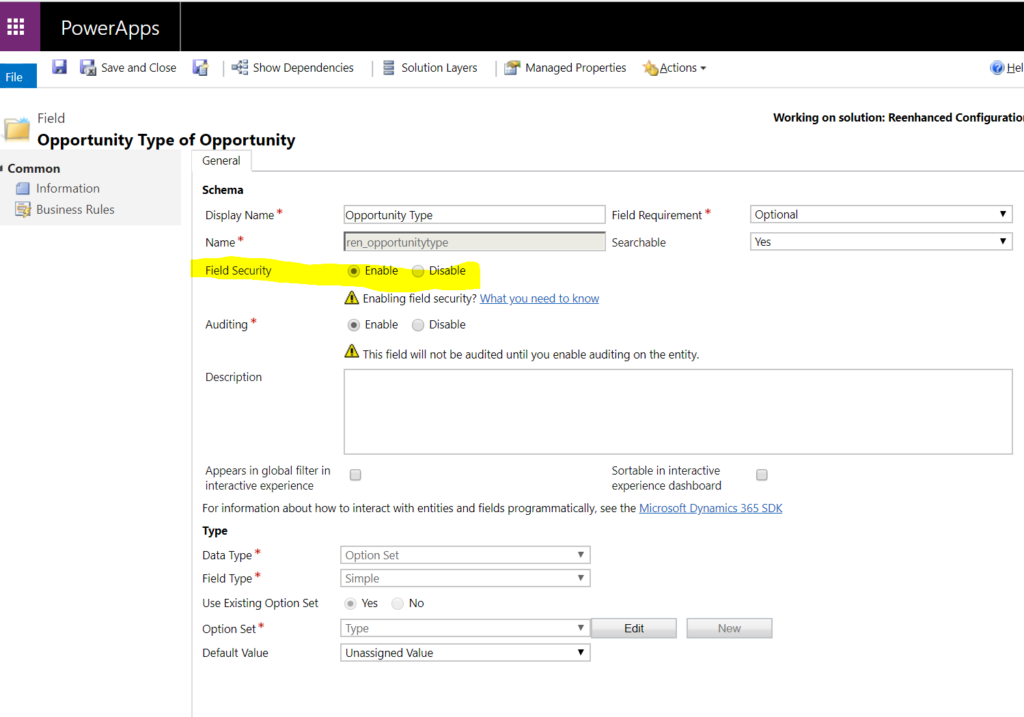
The first thing we need to do is enable field security for a specific field. Open the field, and simply click Enable on Field Security (highlighted below).
Repeat the above process for any fields.
After you have enabled field security on all fields, the next step is to configure a Field Security Profile. We will walk through the process of creating a Field Security Profile using the Maker Experience AND the Classic Experience.
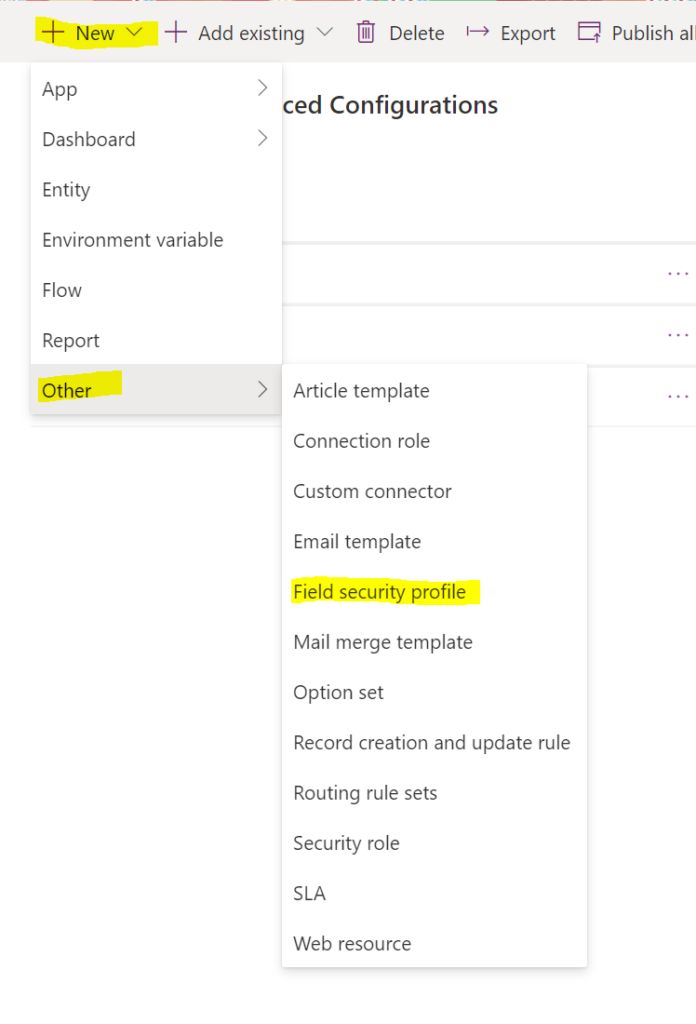
Using make.powerapps.com:
- At the top, of your Solution, click +New
- Select Other, then select Field Security Profile
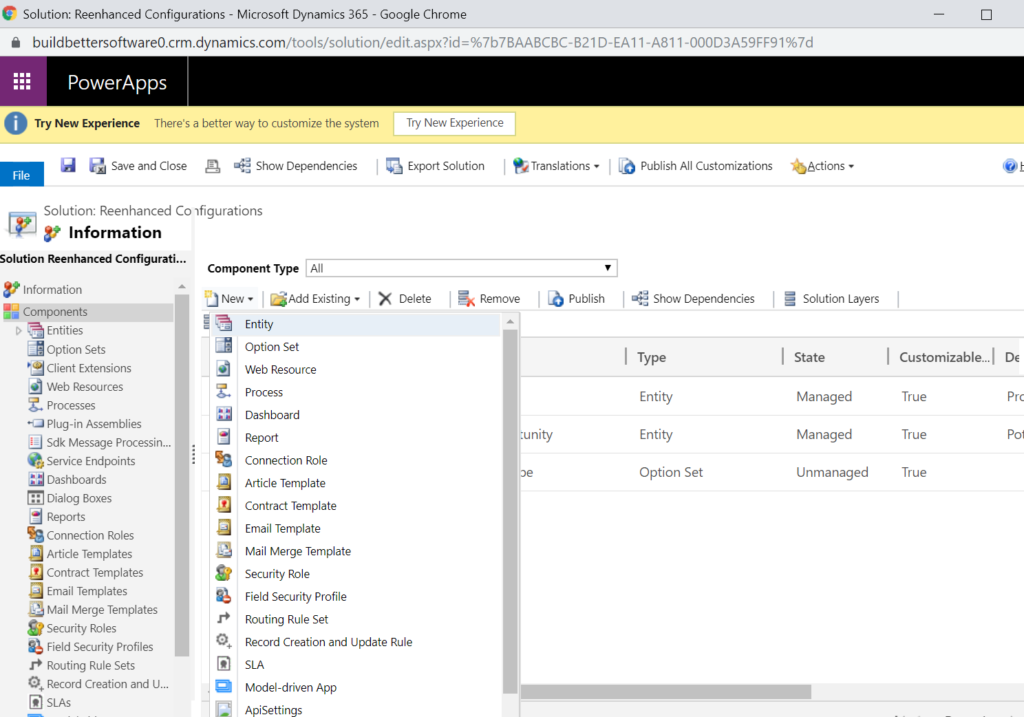
Using Classic Experience
- In your solution file, click +New
- Select Field Security Profile
Next Steps
Regardless of which experience you used to create your Field Security Profile, the remainder of the steps are identical:
- Name your Field Security Profile in the new window that opens, then click Save at the top.
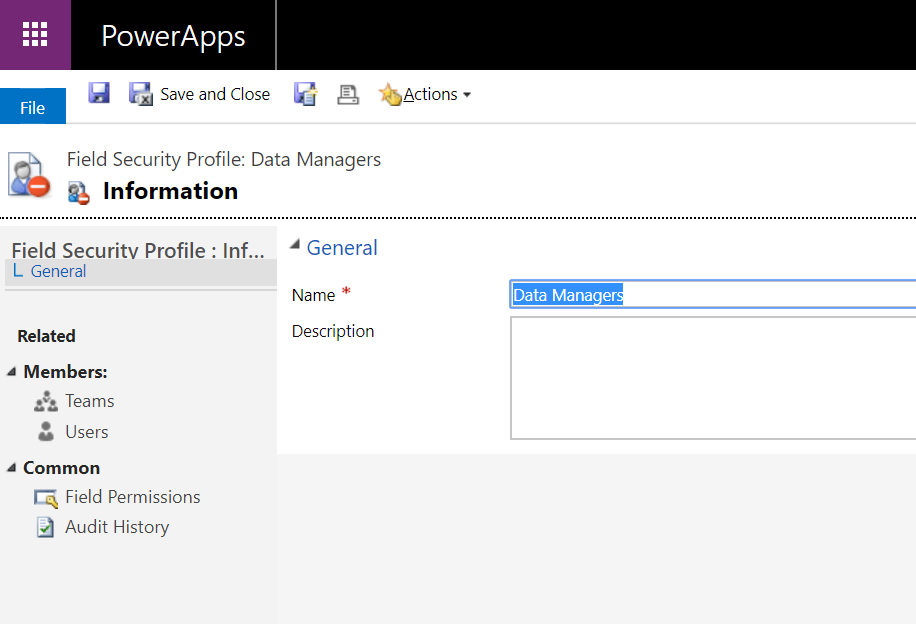
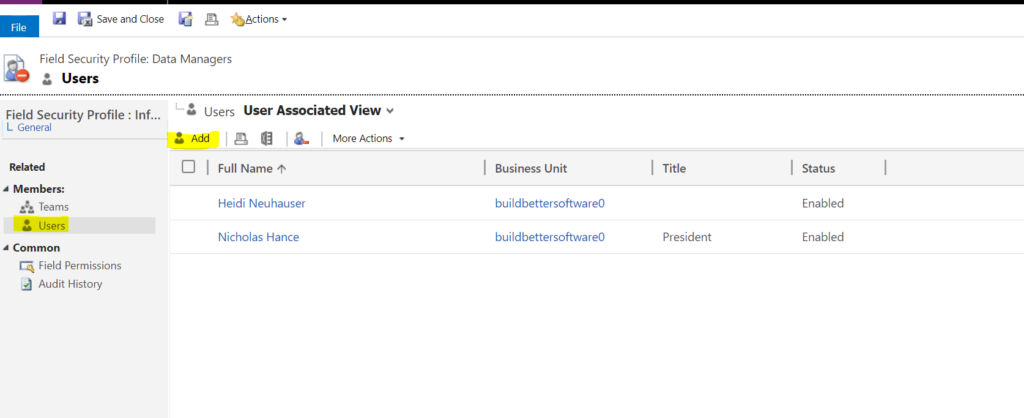
2. On the left-hand side of the Field Security Profile, you can now add Teams or Users. Add the appropriate users/teams to your Field Security Profile.
Now that you have set enabled Field Security on selected fields, built a Field Security Profile and added users, it’s time to set permissions for each field!
In your Field Security Profile, click Field Permissions on the left-hand side (highlighted below). A list of all fields with Field Security enabled will appear.
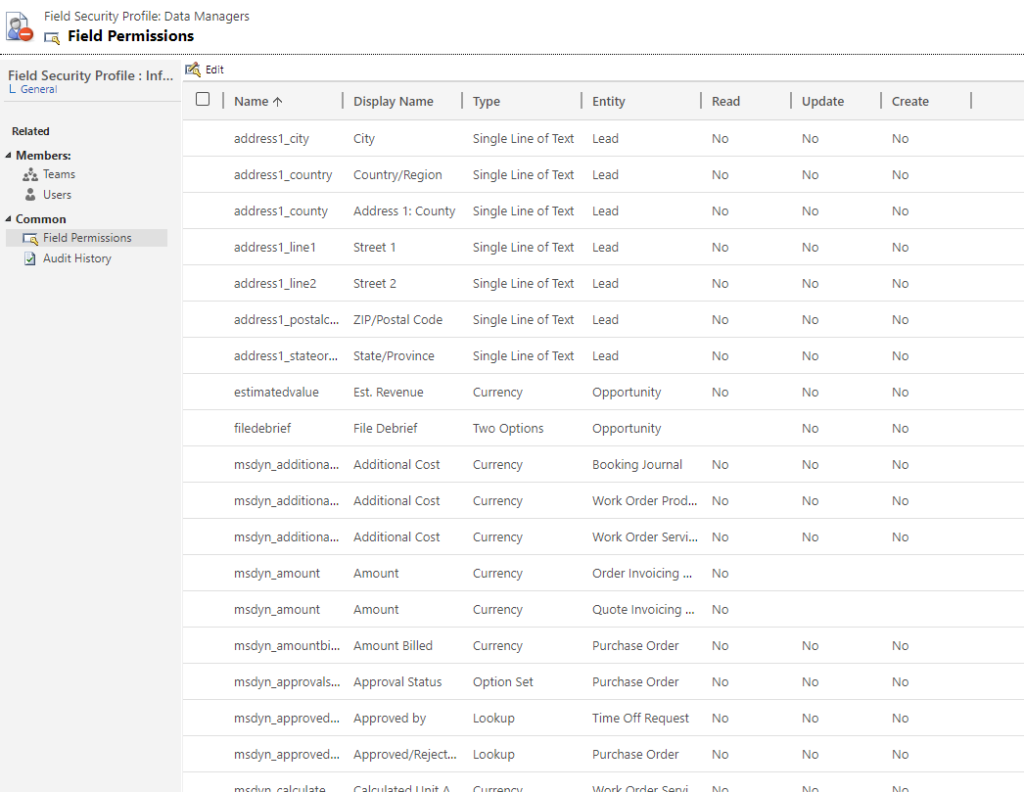
There are three permission levels for each field:
- Read: Users belonging to this Field Security Profile will be able to read data in this field.
- Update: Users belonging to this Field Security Profile can edit and update data in this field.
- Create: Users belonging to this Field Security Profile can create data in this field.
To set permissions, open each field individually and set the appropriate permissions:
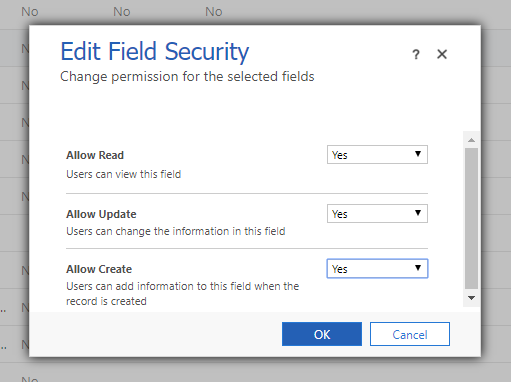
When you have completed this process for all fields, click Save and Close at the top.
Field Security Profiles are powerful tools to lock down data when needed. If you need help getting started or setting up field security in your organization’s Dynamics 365 organization, feel free to reach out to reenhanced! Fill out our Contact Form with details about what you’re working on, or email me directly at [email protected]. Happy configuration!