Model-driven apps in PowerApps: Using the App Designer
Welcome to our second blog in the model-driven app series! Today we will focus on getting to know the App Designer. This series includes six articles that will help you to get to know and use model-driven apps and PowerApps:
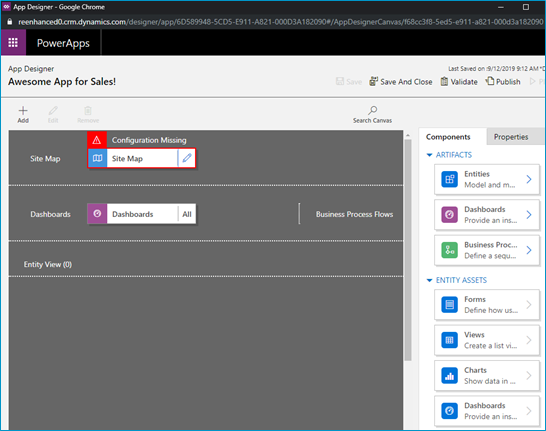
When you open your model-driven App in the App Designer, it will resemble the image above. You will notice a few main areas here:
- Site Map
- Dashboards
- Components (Artifacts & Entity Assets)
- Properties
Using the App Designer is fairly simple and should be familiar to System Administrators as it uses a similar drag and drop configuration style used in building business rules and business process flows. Microsoft has done an excellent job making configurations like these accessible to the less technical System Administrator (like yours truly!).
Let’s briefly look at each of these – as all of these areas will be covered thoroughly in subsequent articles.
| Site Map | Controls which areas of Dynamics 365 can be accessed in this App |
| Dashboards | List of any system dashboard included in the App |
| Components | A list of entities and entity assets (forms, views, charts) that are in this App |
| Properties | Name and description of the App, custom icon (optional), unified interface URL |
Stay tuned for the rest of this series on building a model-driven app in Dynamics 365 using PowerApps, where we will dive deeper into the Site Map, Components and Properties.