Dynamics 365 CRM System Administrator How To Guide: Modify System Views
Every Dynamics 365 System Administrator will need to modify system views. You will get a requirement to add, remove or move a column, to change the way your data is displayed in the view or perhaps need to change the filter that powers the view. Here’s everything you need to know about how to modify system views in Dynamics 365! (Note: This article assumes you are already comfortable working with solution files. If you need more help with solutions, check out this great article.) Below, you will find instructions for both Dynamics 365 Online customers as well as those who are On Premise.
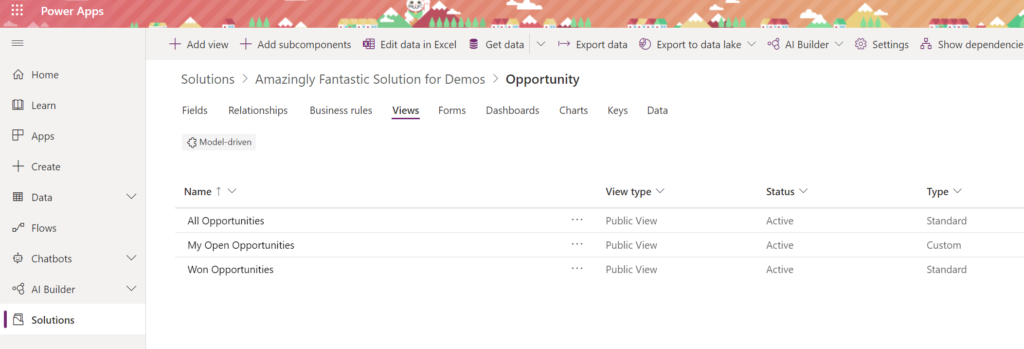
In my Solution file, I have added the Opportunity entity and three system views that I want to modify. After adding your components to your solution file, follow these steps to update your views:
1. Navigate to the Entity, then the Views tab at the top (in this example, we are using the Opportunity entity).
2. Click the Name of the view you want to edit. This will expand the view and open a canvas for you to work with.
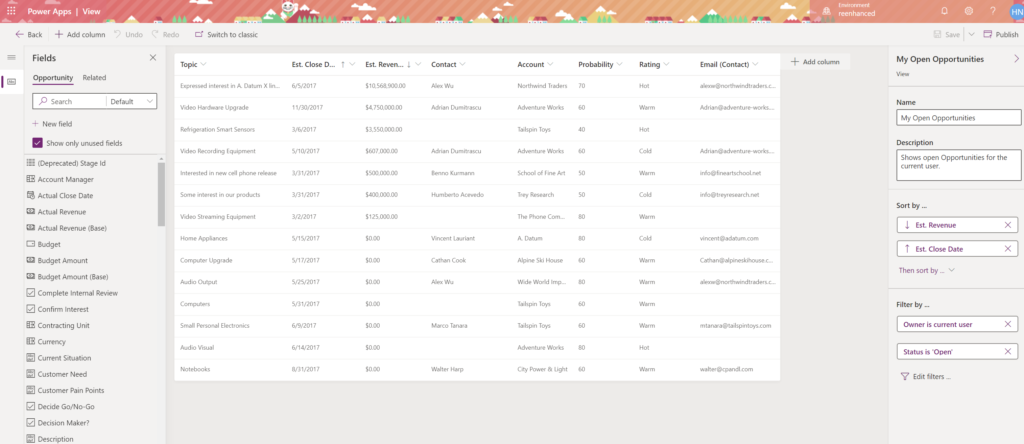
- On the left-hand side, you can find any unused Fields. It defaults you to the entity you are on (here, the Opportunity), but you can click Related to view related entity data.
- In the center is your Canvas. Simply click and drag fields from the left and drop them where you’d like them to appear. You can also click on columns in this canvas to change width or rearrange order. Or, highlight a column and remove it. Microsoft gave us the “Easy Button” with this update!
- On the right-hand side are details about Sorting and Filtering. To adjust either, simply edit them directly in this panel.
In the maker experience of Power Apps, you are able to click and drag everything to accomplish anything you’re looking to do in this one spot. It’s a pretty great upgrade from the user experience from the classic solution designer.
Let’s walk through how to do the following for On Premise customers:
- Add new columns
- Edit filter criteria
- Configure sorting
- Remove columns
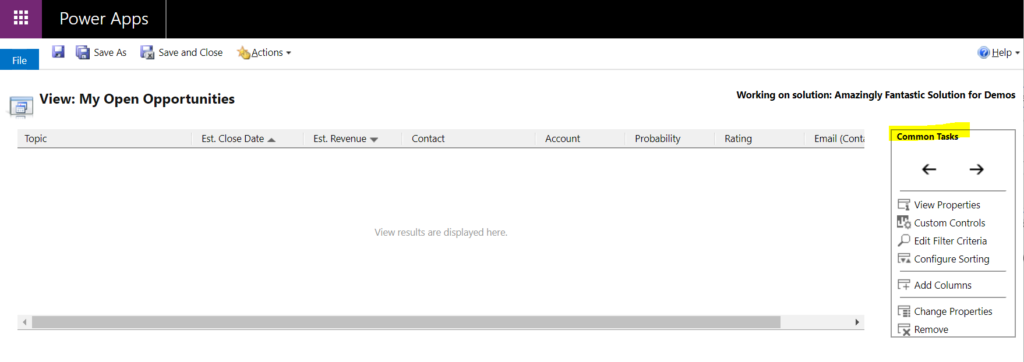
Unlike the above section for those-who-shall-not-be-named (aka Online customers), you’ll have to do separate things for each of these four tasks. But it’s OK! They’re all done in the same spot, the Common Tasks box of your system view:
Adding New Columns
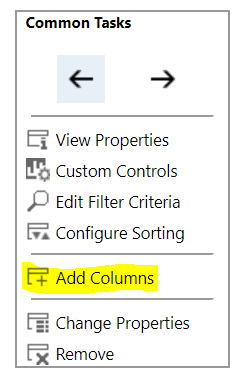
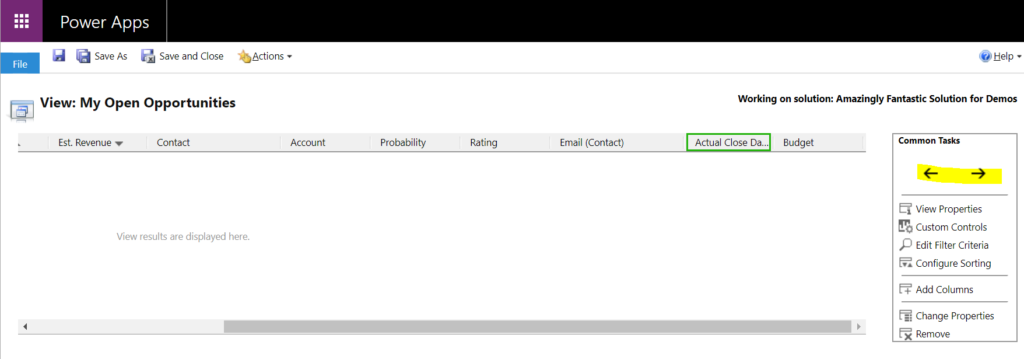
Once you have opened up your view in the classic solution designer (as shown in the screenshot above), follow these simple steps to add new columns.
1. In the Common Tasks box, click the Add Columns icon.
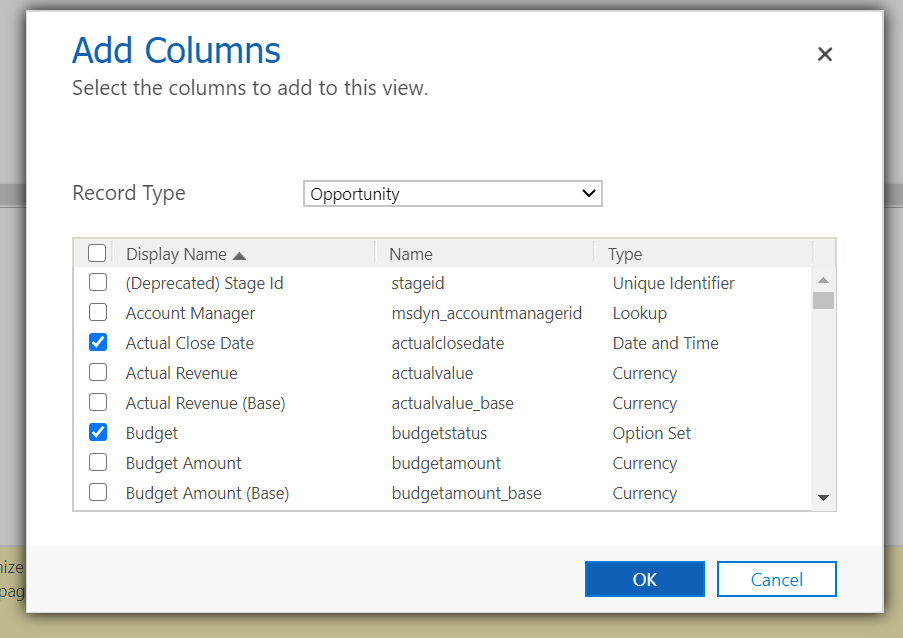
2. All unused fields will appear in a box that opens up. It defaults you to Record Type but you can change this to get data from related records.
3. Check the boxes of fields you want to add, then click OK at the bottom.
4. Now, click on a column until it is outlined in green. Use the left and right arrows in the Common Tasks box to move the field(s) to the spot you want them to appear in the view. (Please resist the urge to look above and see how easy it is for Online customers to do this. It won’t make you feel better!)
Edit Filter Criteria
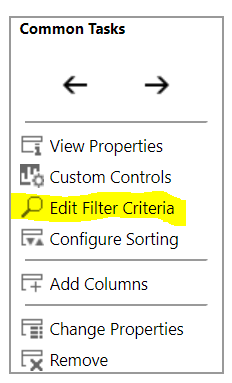
If you need to edit the filter criteria, look no farther than the Common Tasks box!
1. Click Edit Filter Criteria (highlighted in this screen shot) to launch the editor.
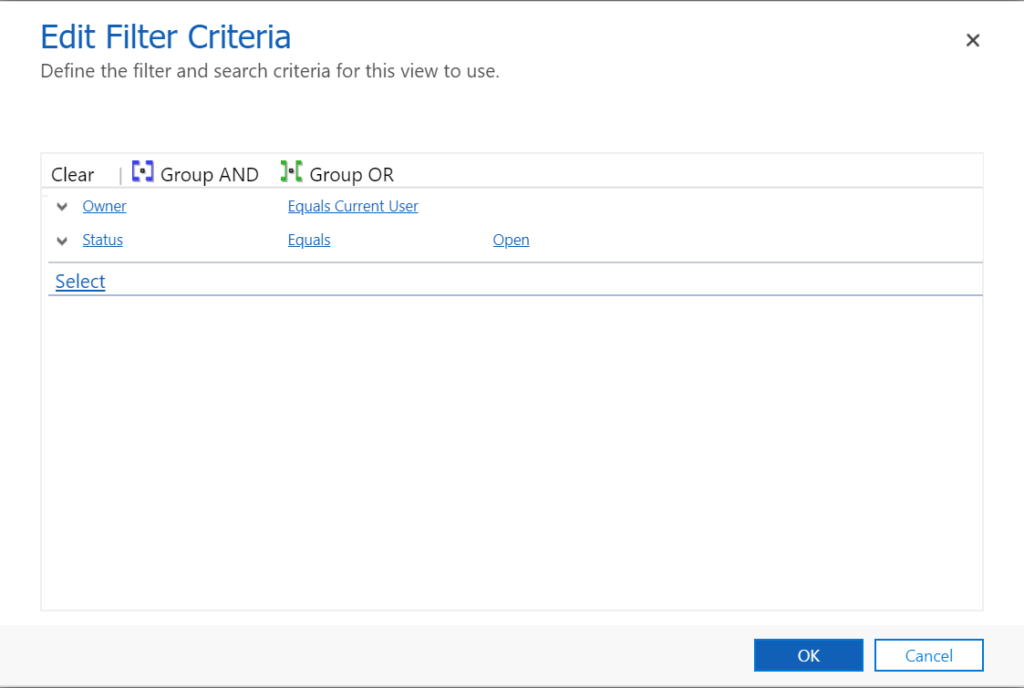
2. Put on your Advanced Find Expert cap and work on your filter criteria! Make any updates you need to this area, and when you have finished, click OK.
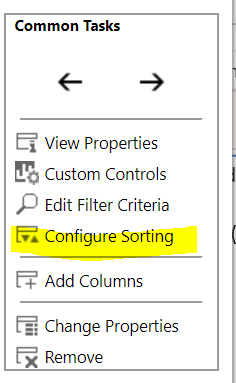
Configure Sorting
Once again, head over to that Common Tasks box.
1. Click Configure Sorting.
2. Select your Sort By field, then select a Then By field if desired.
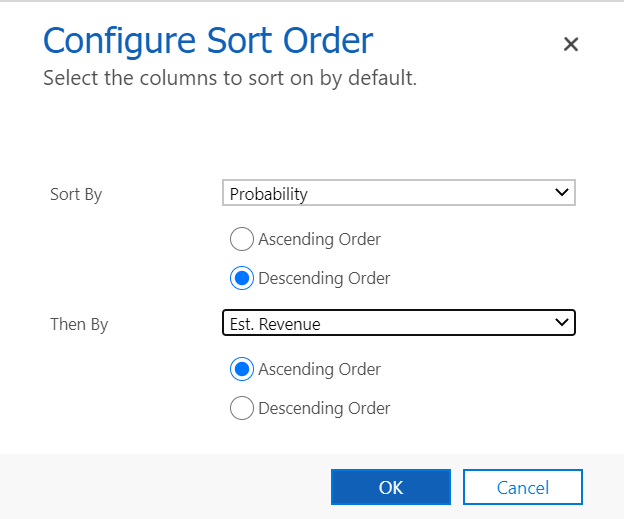
3. Click OK.
Remove Columns
Removing columns is simple. Let’s start at…. you guessed it!… the Common Tasks box!
1. Click on the column you want to remove. Make sure the column name is outlined in green.
2. In the Common Tasks box, click Remove
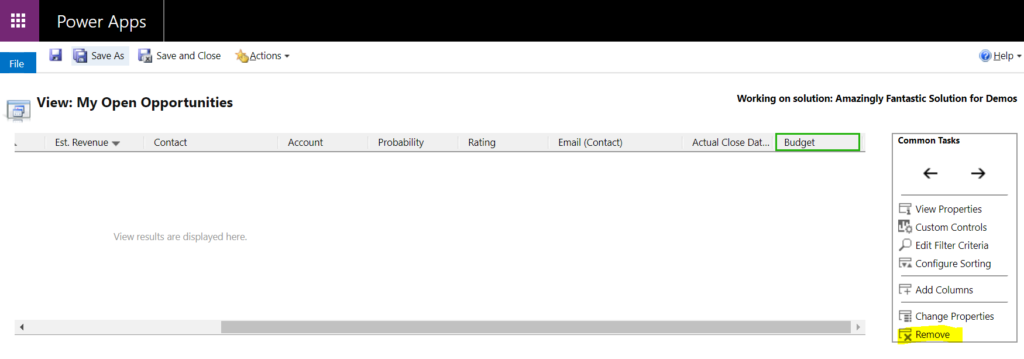
3. Your CRM system is kind enough to double check before removing this column from the view. If you meant to remove it, simply click OK on this pop-up, otherwise breathe a sign of relief and click Cancel.

This section will be updated as more articles are written in the How To Guide for System Administrators.