Gravity Forms by reenhanced. Our first connector is live!
Reenhanced is proud to launch our first Power Automate connector! Gravity Forms by reenhanced is the quickest, easiest, and only way to officially integrate your Gravity Forms submissions into Power Automate. Install this WordPress plugin and configure your forms to map your form submissions to dynamic fields you can use in any flow.
What does it do?
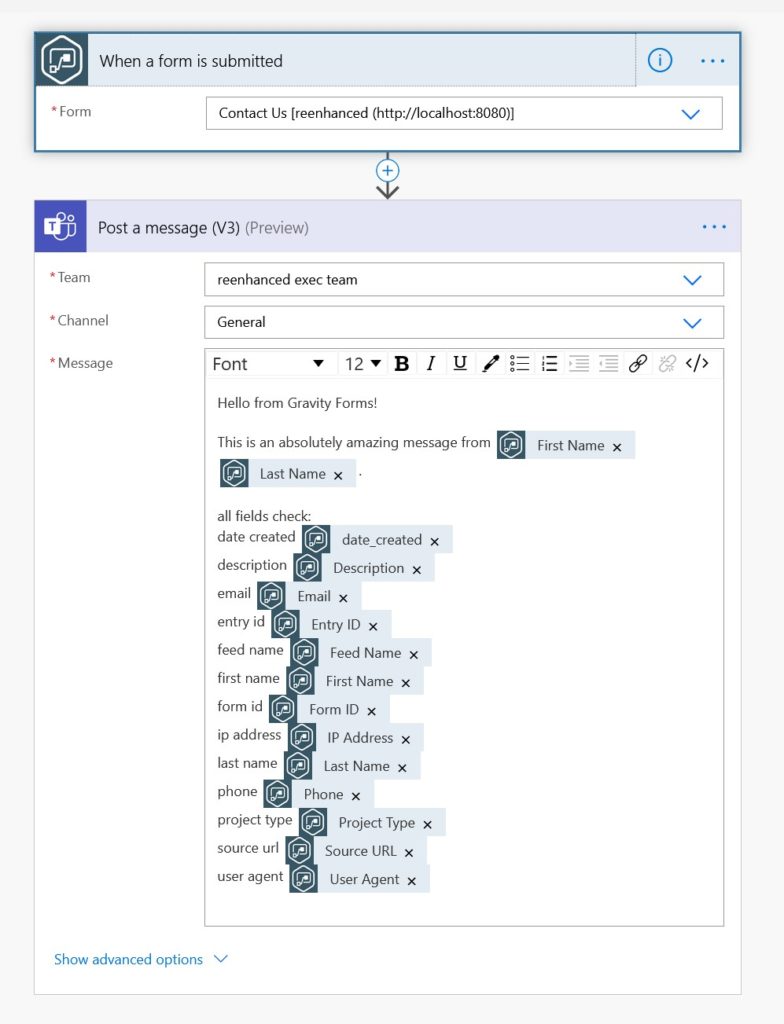
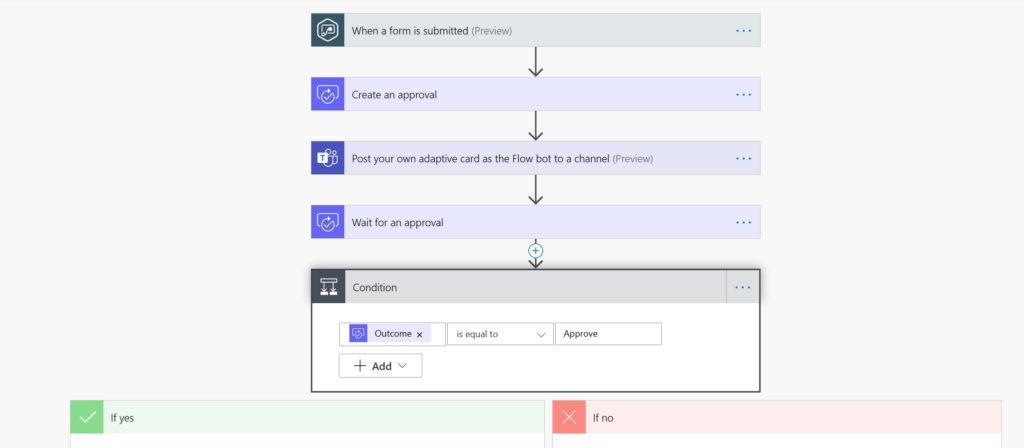
Anytime a visitor submits a configured form on your website, that entry is sent to Power Automate to start all the flows configured on that trigger. Let’s take a look at how we’re using it on our website here.
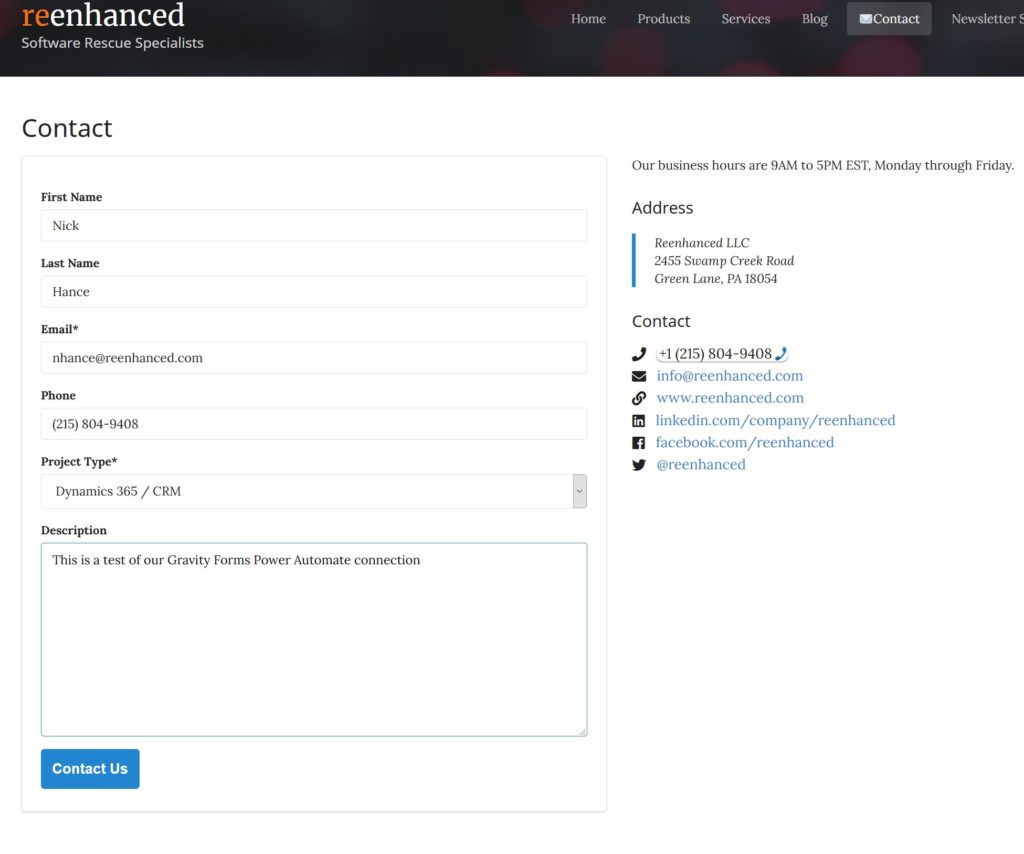
For example, when a user submits our contact form (above), the following Power Automate flow is started:
Each time the contact form is submitted, this process walks through each step in the flow. The Approval process means that someone from our staff reviews each message, in close to real time, and only if the message is not spam does the rest of the process complete.
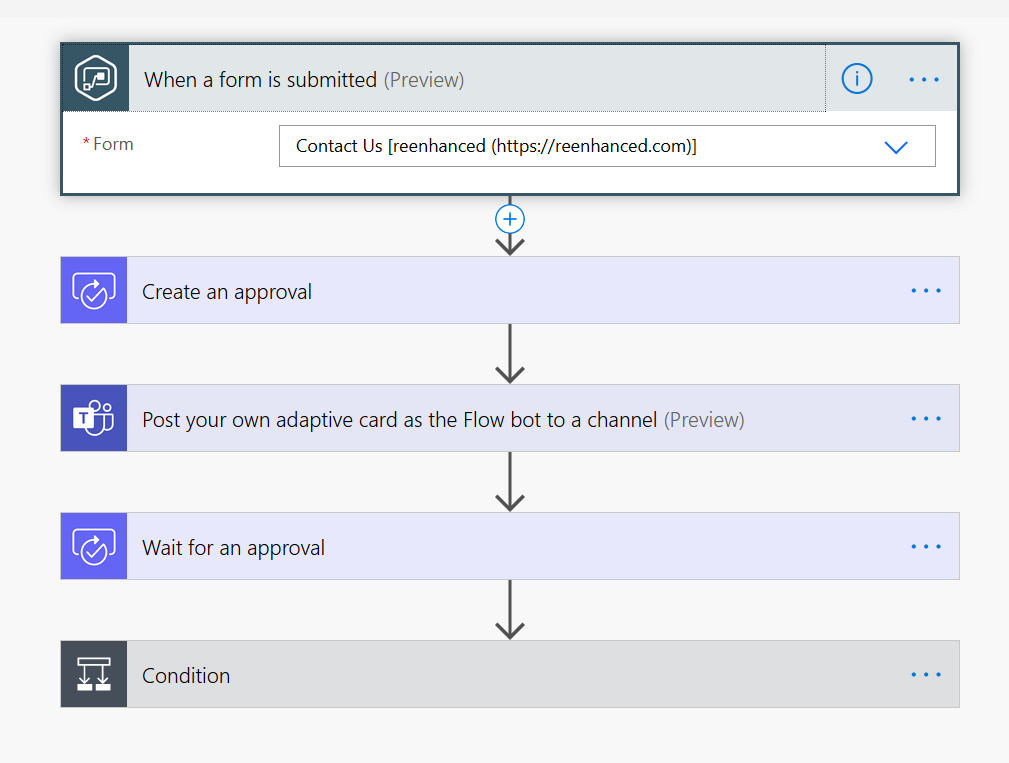
Let’s take a deeper look at how this works and how the Gravity Form connector can work for you.
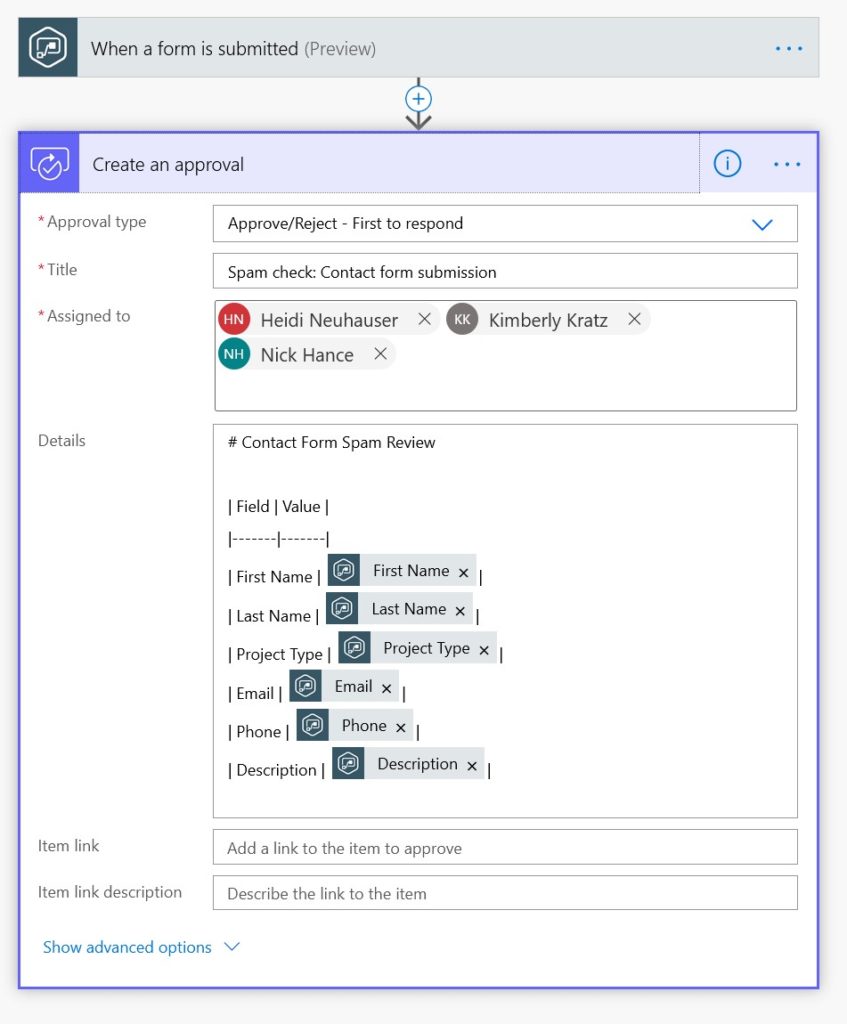
Immediately after our contact form is submitted, the above Flow starts an approval.
We could of course skip the approval process, but then we could end up filling our CRM with a lot of spam which makes it harder to provide amazing service. By putting human review at the top of the list for our contact form we ensure that we’re responding quickly and only when responses are valid.
The above approval pops up a notification on the phone for myself, Heidi and Kimberly and also appears in the Power Apps approval dashboard like this:
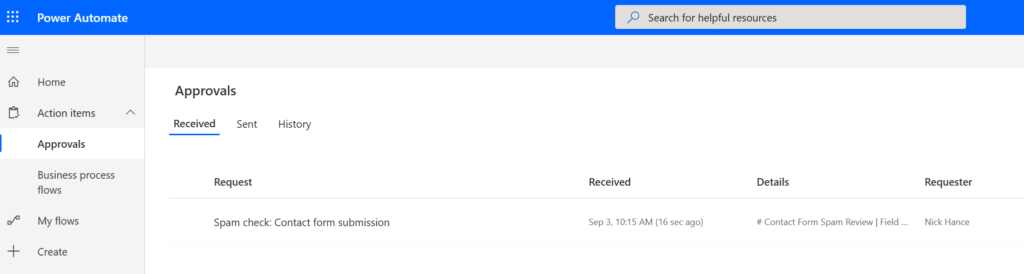
Any one from the team who has received this can respond to this approval, but how can we be sure that we see the approval? We may be near a phone but its easy to miss a notification with how many we’re receiving each day.
To make sure our approval is seen by the team we’ll send it to our teams channel so we never miss a message. Here’s what our team sees:
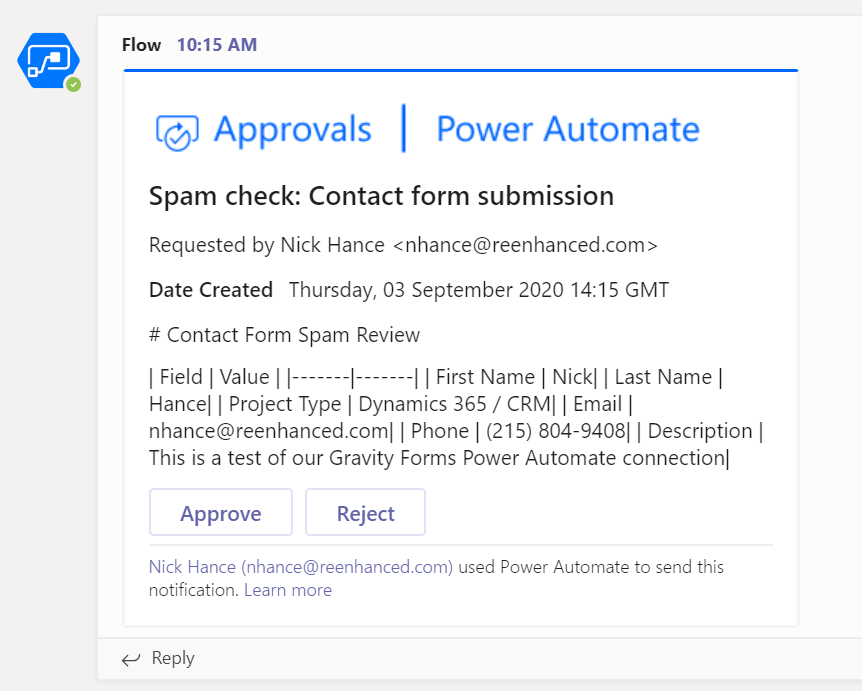
This approval sits right inside of our Teams, meaning it’s highly visible alongside the rest of our company business and lets anyone approve or deny it as a valid request. (At this time, the adaptive cards appear to not support the table-based formatting of our messages.)
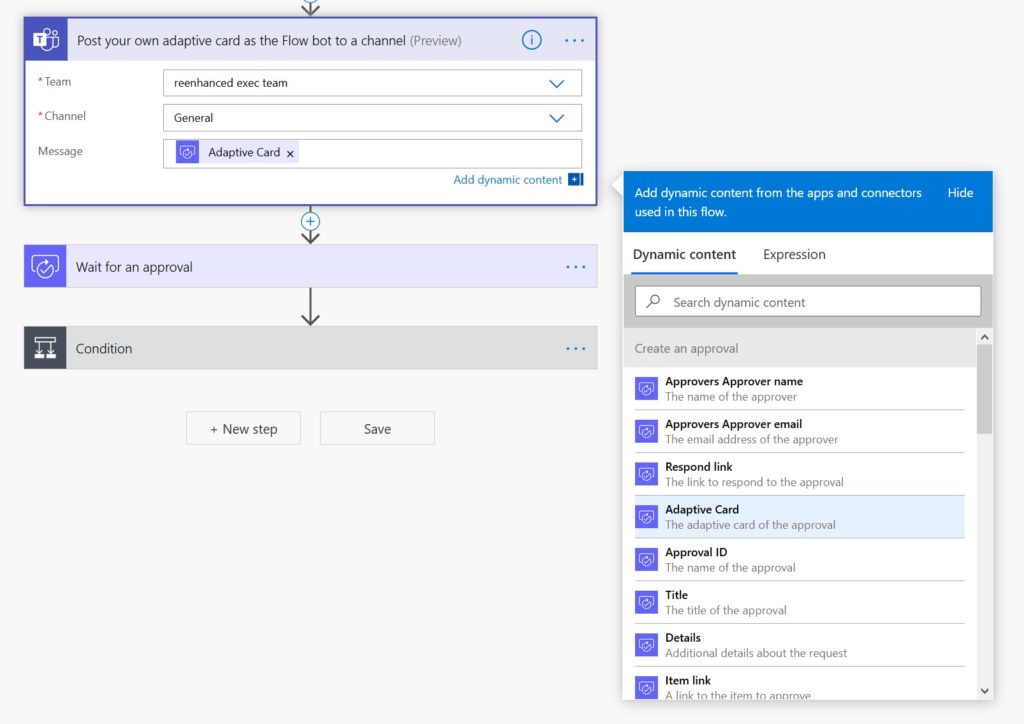
Here is how we configure this within Power Automate:
What happens to the approval when we respond?
The only reason we manually approve or deny these requests is so that we can do something after either a valid or invalid request. To do that, our flow has a Wait for an approval step that allows us to capture the output from the approval we started earlier.
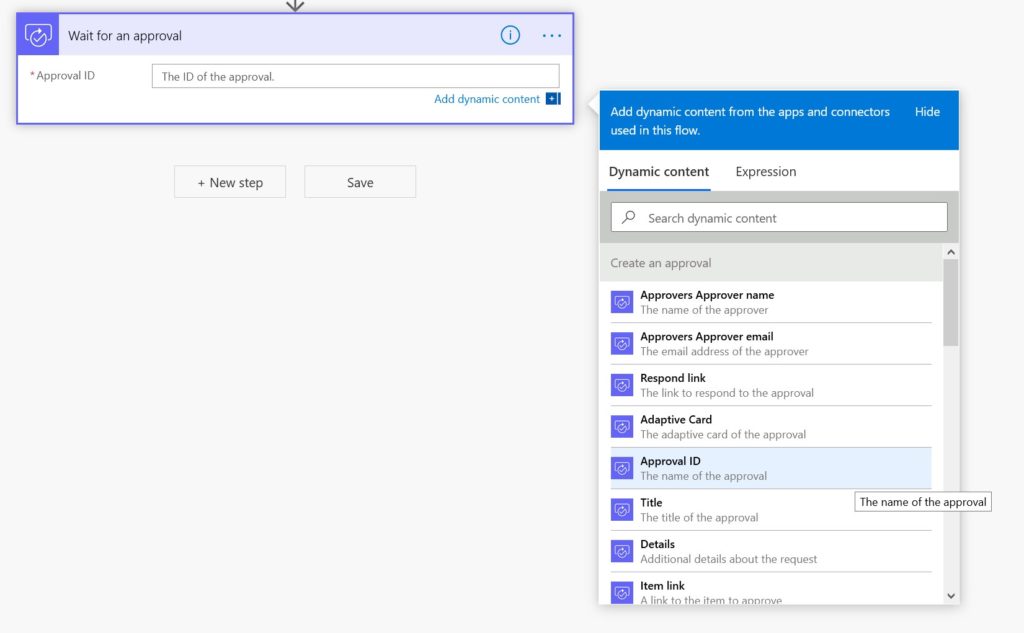
This step in our flow will pause until someone responds, either by phone or email or through the adaptive card we put into our Teams channel. Once we have the response, we added a conditional step to our flow so we can handle real requests differently than spam.
We have a valid contact message! Now what?
By filtering out spam, we can direct only valid messages to those who need to respond quickly. We rely heavily on the Dynamics 365 platform so all we need to do is create a new lead in our CRM and other workflows will fire to help us respond quickly.
Our next step is to create a lead after our form submission is approved:
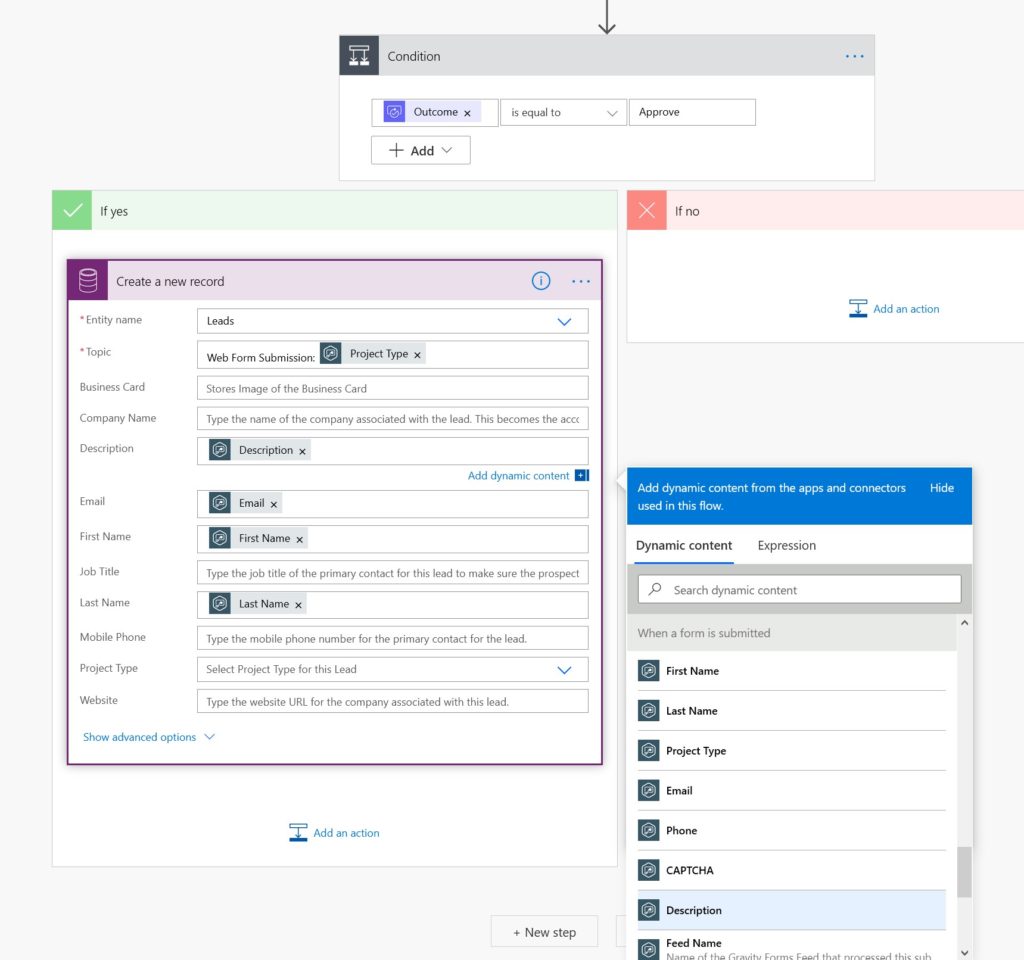
Here you can see how we pull the values from the original submission on our contact form directly into Dynamics, all using the field names as defined in Gravity Forms.
This will work for any form you configure to send to Power Automate when using our plugin. If you think this is useful, head over to the product page and get started on your form automations today!