Writing a Blog Approval Flow in Power Automate
If you’re in the Power Automate space, no doubt you have heard about and likely written an approval flow. In case you haven’t used this powerful part of Power Automate yet, we thought we’d document exactly how we will be build our new blog approval flow.
The Business Scenario: Peer Review of Blog Articles
Business Problem: A new blog is written and it needs to be reviewed by one or two colleagues. Today, the entire process is done in a Teams Channel. It is entirely manual and leaves room for human error. Here are our current steps:
- Author writes an amazing blog about Dynamics 365, Power Automate, Web Apps, Custom Apps or some other extremely intriguing topic.
- Author posts in appropriate Teams Channel (aptly named Blog Approval Requests) and tags all colleagues asking for a review.
- Author waits until one or two colleagues review.
- Author receives feedback and approval of blog. (Only 1 peer review is required before publishing).
- After author sees this in Teams, he/she will publishes the blog article.
Obviously, this process has a lot of holes in it and we at Reenhanced prefer to automate business processes wherever we can. This leads us to….. an automated solution!
The Solution: Approval Flow in Power Automate
Here we are – at the solution! We have decided to implement a new Peer Review Approval Flow in Power Automate to take the manual steps out of the process. Why? Here are the key reasons we selected this solution:
- It saves time – once an Author submits the blog for approval, we can make this a two-step process: write the blog & add a Teams post to get approval.
- There is no reliance on the Author to follow up to get peer review approval.
- It’s an automated, seamless solution!
- No more manual processes and a decreased chance of user error or missing a post in Teams.
Implementation of Our Approval Flow
To get started with implementing an approval flow, go to make.powerapps.com and select Flows. For this simple example, I wanted to use Teams only, so I didn’t start with a template. There are several approval templates you can select from if they meet your needs (like “Send an approval email and follow up via email”).
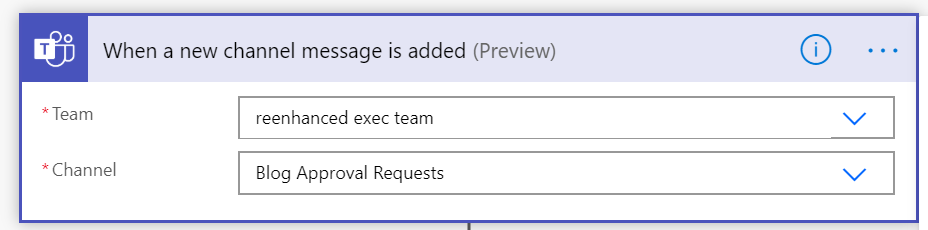
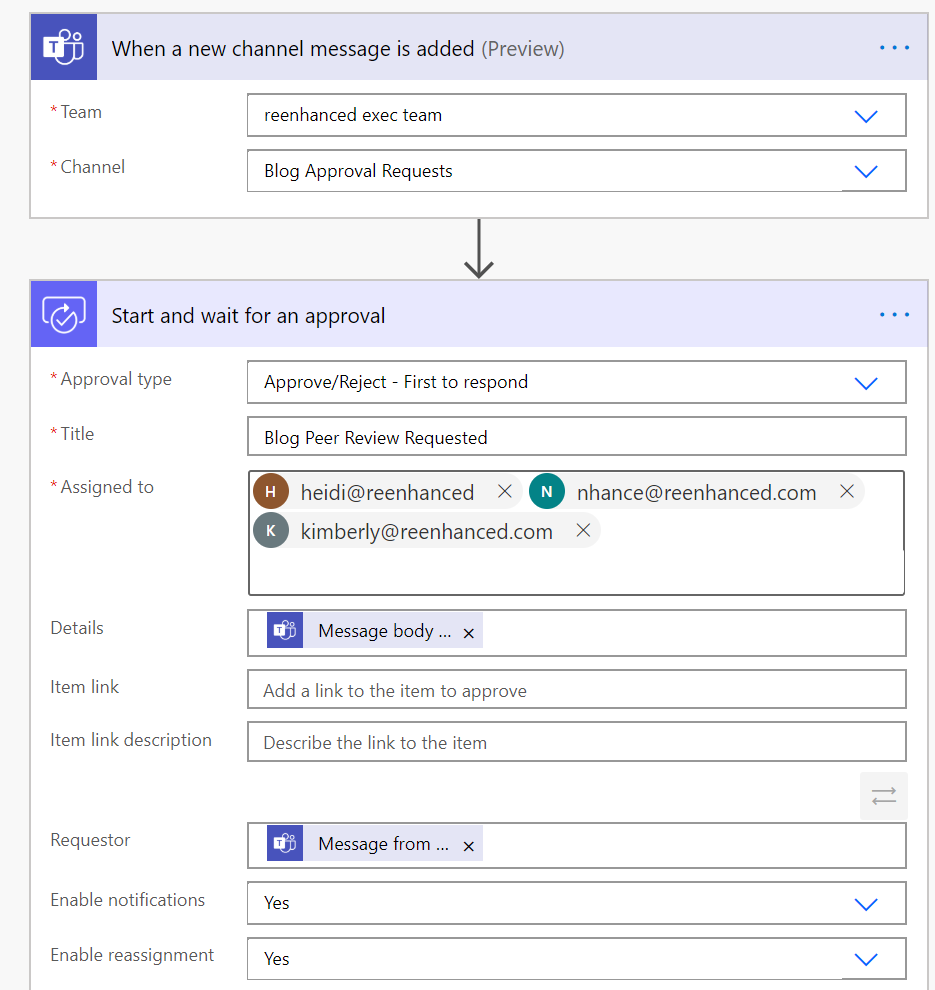
In our flow, we only need two things: Teams and Approvals. To kick this off, I want to use an existing Teams Channel at Reenhanced called Blog Approval Requests. Here is what the first part of my flow looks like:
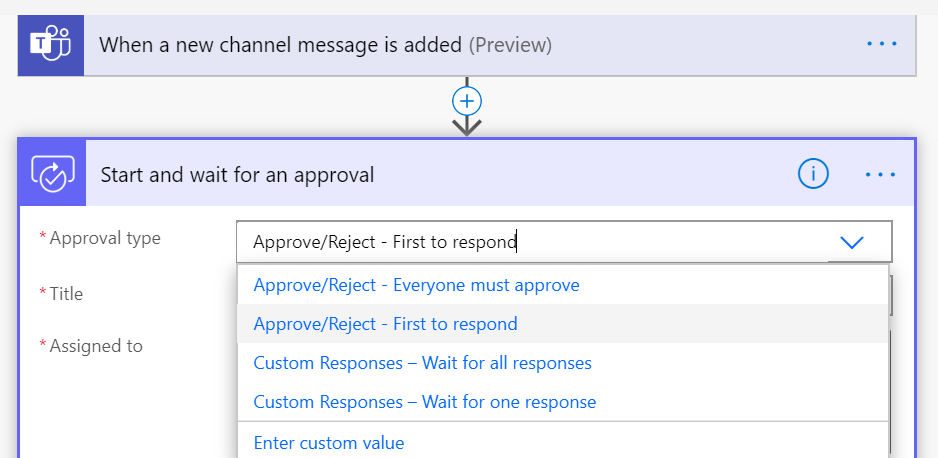
Next, click on the + New step button. For my action, I want to start and wait for the Approval, so I select the action to Start and wait for an approval. We only require one approval for this process, so I selected the Approval type to be Approve/Reject – First to respond. (You can see the full list of options in the below screen shot).
Once I select Approval type, I can fill in the rest of my details. I have added a title for the Approval. We will be assigning this to the core executive team at Reenhanced, so I’ve added all three email addresses in the required Assigned to field. I’ve mapped the Teams message body to pull into the Approval details and Message From to show as the Approval Requestor.
Finally, after the blog has been approved or rejected, we want to automatically add a reply to the original post with three items: the outcome, any comments and the approver’s name.

And there we have it! A very simple example of how we took a manual process and transformed it to a simple, automated approval process!