How to Configure Viva Sales for your Organization
Viva Sales for Microsoft Outlook is a powerful tool to help your sellers. Here are a few great features you can use when the add-in is launched in your Outlook:
- Add contacts to Dynamics 365 or Salesforce from Outlook.
- Add content from Dynamics 365 or Salesforce into your emails.
- View recent and upcoming activities for a Contact in Outlook.
- Add personal notes.
- Use AI to start email replies.

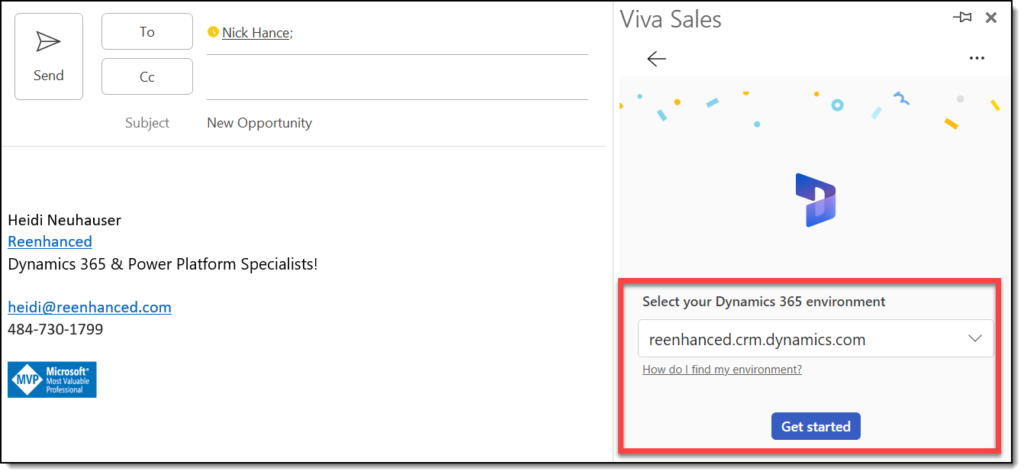
Viva Sales launched in an Outlook email.
Step 1: Configure Viva Sales Add-in for Microsoft Outlook
The following steps will walk you through how to configure the add-in for Microsoft Outlook.
You will need proper permissions to complete this step! Make sure you have Microsoft 365 Admin Permissions before completing these steps.
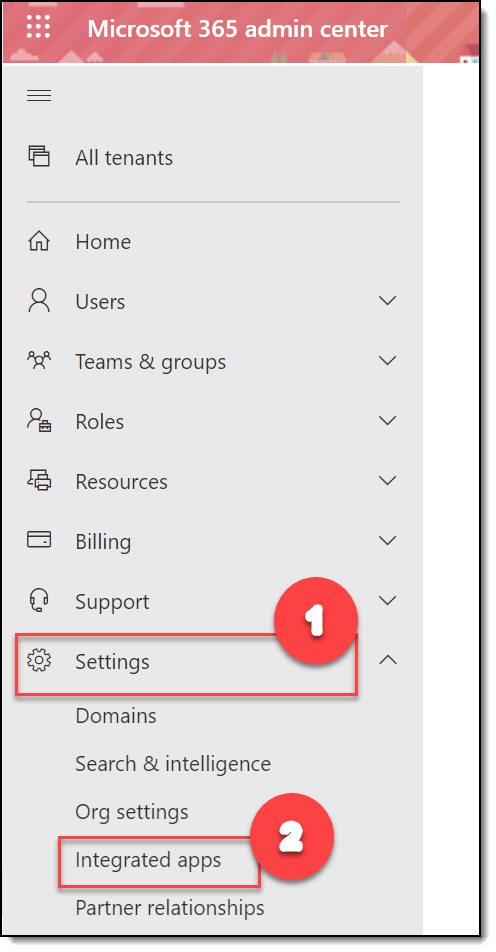
- Navigate to the Microsoft 365 Admin Center.
- Go to Settings, then Integrated Apps.
- Select Add-Ins, then Deploy Add-In

- Walk through the Deploy a new add-in wizard. On the second screen, select Choose from the Store.

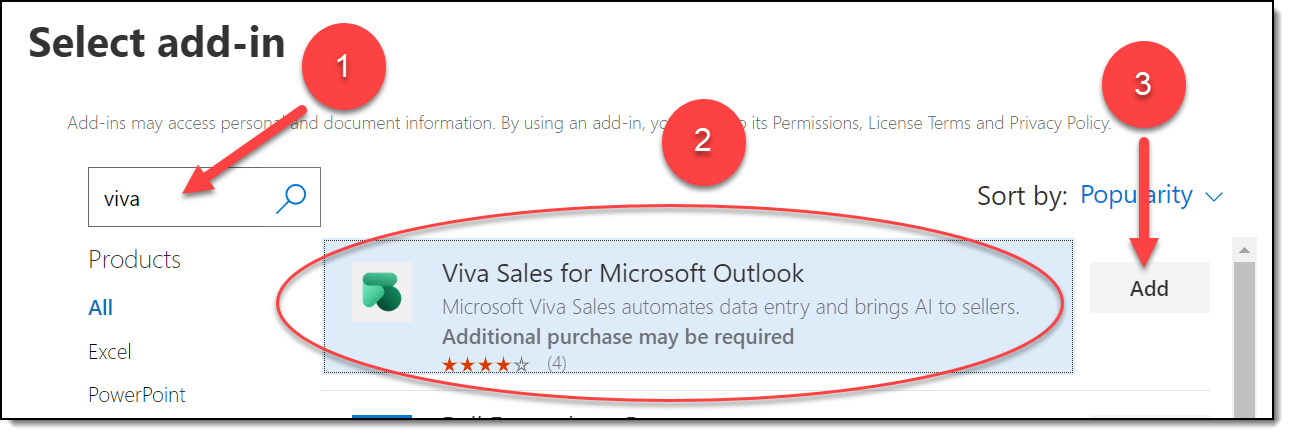
- Search for the Viva Sales for Microsoft Outlook add-in, then click Add.
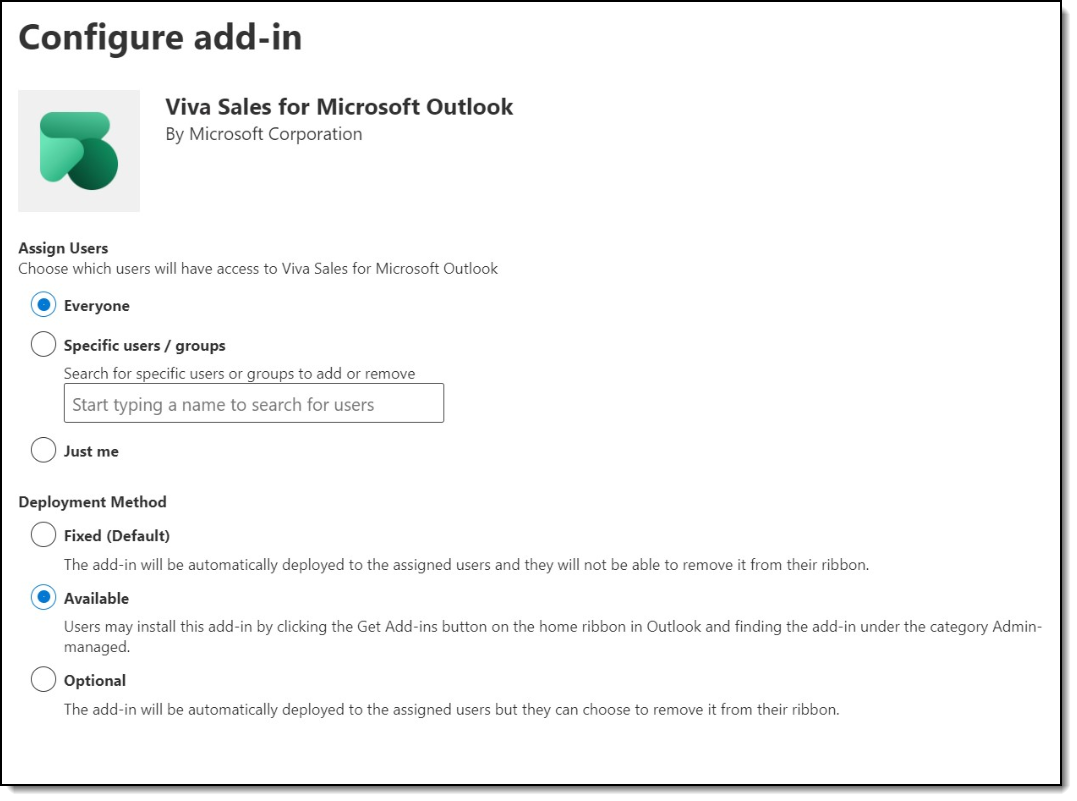
- In the Configure add-in screen, select options for Assign Users and Deployment Method.
- Deploy the add-in. Continue through the wizard until you see the green ribbon saying “Your add-in has been deployed.”
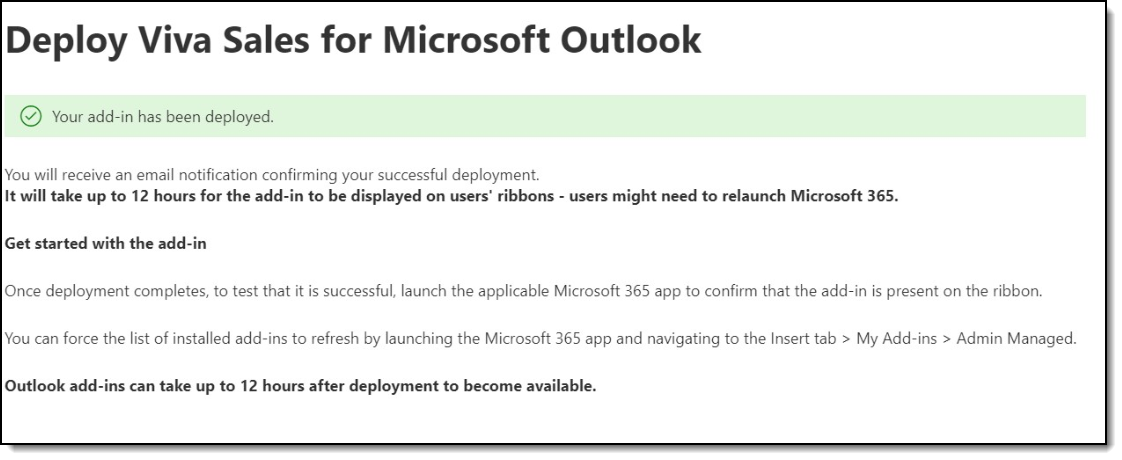
Then… Wait!
It can take up to 12 hours for the add-in to become available to users.
Sign In & Get Started
From an email or meeting in Outlook, launch the Viva Sales panel. Users will have to Sign in to get started. You can select to Sign in to Salesforce CRM or Sign in to Dynamics 365.
Select the appropriate environment, then click Get started.
Step 2: Set up Email Insights & Use AI to Kickstart Email Messages in Teams
To fully unlock the potential of the Viva platform, you to configure two key features: setting up email insights and using AI to kickstart email messages.
Access Viva Sales Settings
The first thing you need to turn on is suggested email content. The second thing you can turn on is summarizing sales meetings, which is in Preview. Both features require navigation to Viva Sales settings.
First thing is first: to properly administrate Viva sales, you must first add it to Teams! Yikes, where was that in the Dynamics 365 Sales documentation?
Here is the complete Microsoft Learn guide on how to set up Viva Sales in Teams so you can update settings that you need to make it awesome, magical and way cooler than the Dynamics 365 App for Outlook.
Let’s get this party started!
1. Head over to Teams. Click your Apps icon on the left-hand menu. Then, search for Viva Sales and select it from the apps list.

2. Click Add.

3. At the top, click Settings, then select Email under Admin Settings.

4. Toggle Suggested replies on and check the box to Include the option to summarize sales meetings.

Now we are talking! Welcome to the AI Magic of Viva Sales
Let’s take that same email I received, but now there is much more do to than simply creating a contact and tracking an email. When I launch the Viva Sales panel, I see suggested topics to create a draft email! Wow! Magic has arrived!

I have selected Reply to an inquiry. It looked at my Outlook calendar to see available time, and suggested a time inside of my normal work hours because the email sent to me was asking for a meeting.

Example: Describe the email you want
Let’s have some fun with Copilot! The Open AI powered Copilot is driving the “describe the email you want” function. Here’s a fun example:

Check out what Copilot came back with! Note that you can describe changes you’d like to see in the email:

Impressive! I’m a big fan of Viva and the capabilities it has. What do you think?