How to move file uploads from WordPress to SharePoint with Power Automate
Let’s write a flow in Power Automate that moves file uploads from WordPress to SharePoint! To do this, we’ll use a few connectors:
- Gravity Forms (one of the most popular form add-ons for WordPress)
- SharePoint
- And a few of the Built-In connectors in Power Automate
Ready to purchase Gravity Forms for Power Automate? Use discount code GETSTARTEDTODAY by August 31, 2021 for a free month ($29 value). Sign up here!
Need a starting point? Use this Power Automate Template to get started!
Overview of the Process
When we plan out our flow, here are the steps we will take:
- Using the Gravity Forms Power Automate trigger When a File is Submitted, we kick off our automated cloud flow.
- Add a Condition to check if the file has value. We used the condition File is not equal to ”.
- Add the HTTP connector to GET the file.
- Finally, add the SharePoint action Create File and specify your site address, folder path, file name and file content.
Trigger: When a Form is Submitted
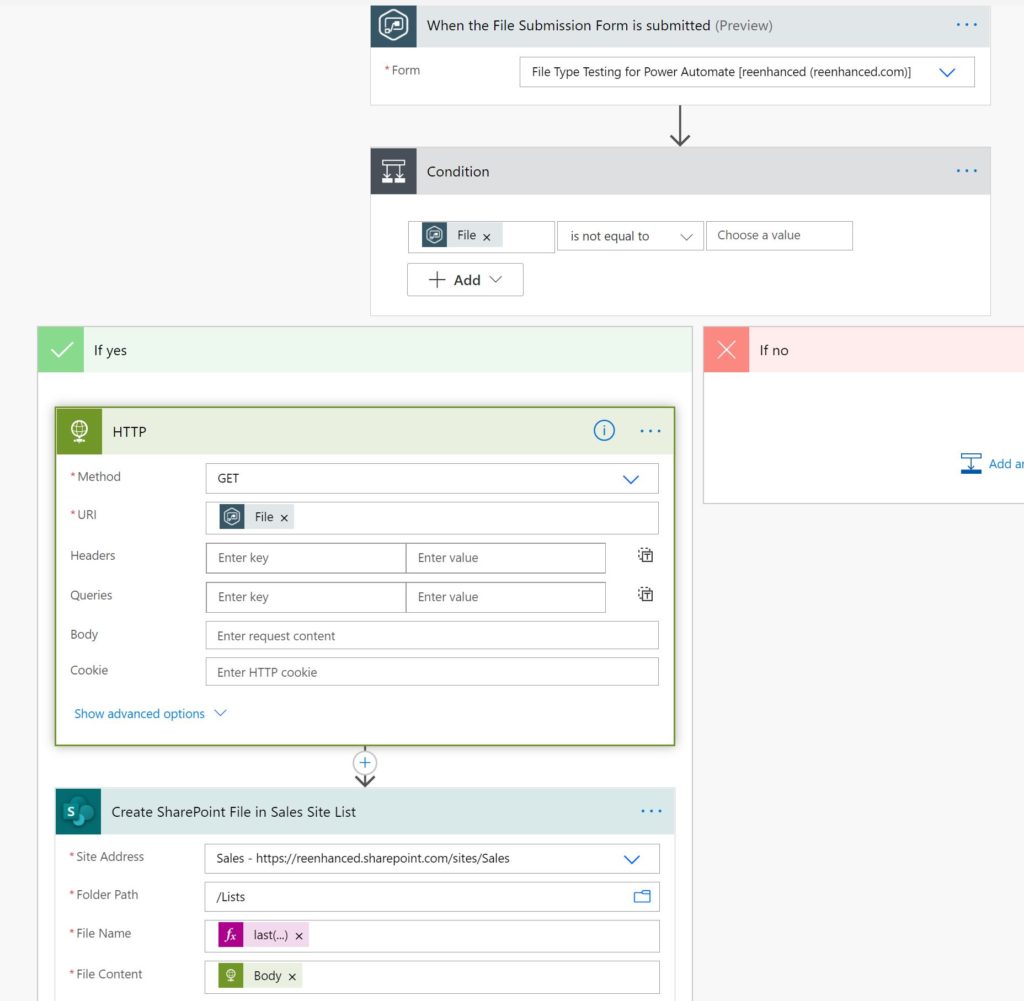
For our trigger, we add When a Form is Submitted from Gravity Forms. Select the form from Gravity Forms / WordPress for the flow:

Actions: Condition, HTTP & SharePoint
Condition
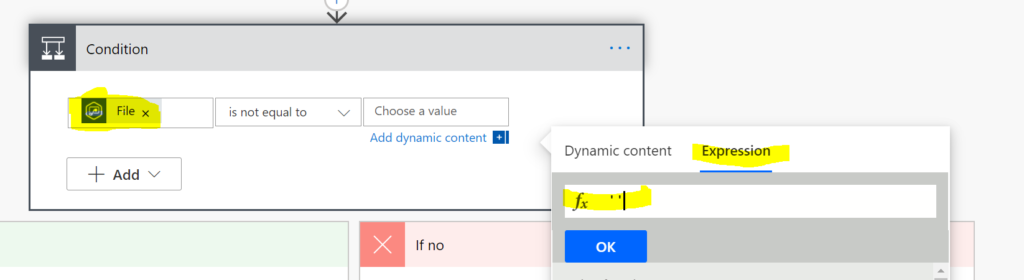
Next, we want to add a conditional. Not every form submission will have a file, and we only want this flow to fire if there is indeed an attachment. The field on my form that collects the attachment is labeled File. I don’t want to take any actions if there is not a file submitted with the form.
In the Condition, I add the File field from Gravity Forms, select is not equal to and create an expression in the Choose a value box that is equal to ” (to capture null values).
Since I don’t want any action when a form is submitted without a file, I can focus all actions only in the If yes part of my condition.
HTTP
In the If yes box below my Condition, I need to add the HTTP connector (which you can find in the Built In operations area highlighted below).
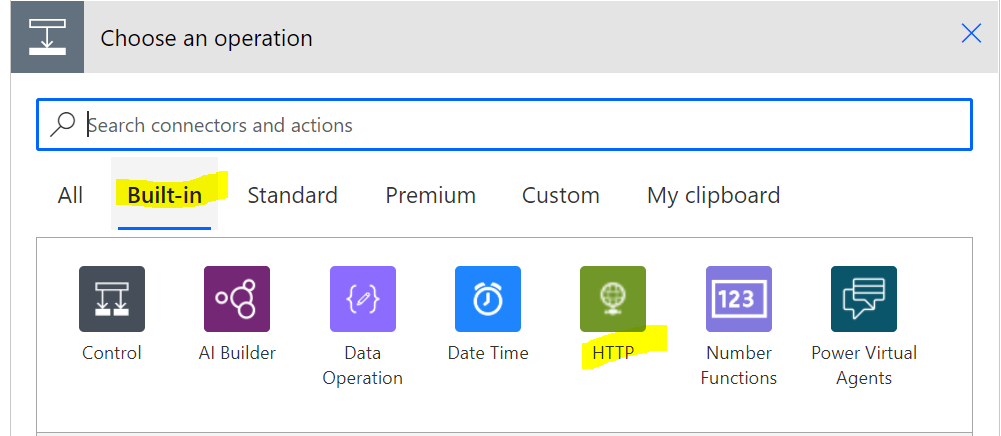
In the available actions, choose HTTP:
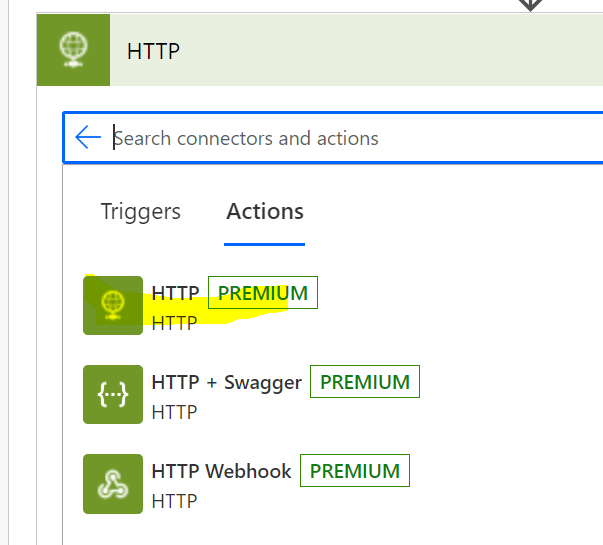
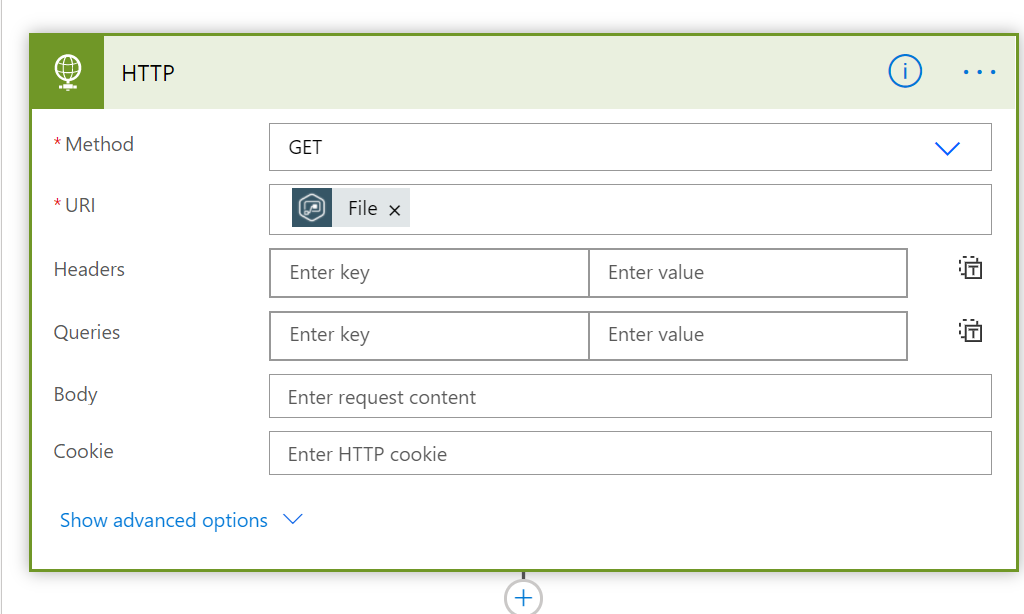
For Method, select GET. For URI, select the File field from the Gravity Forms trigger:
SharePoint
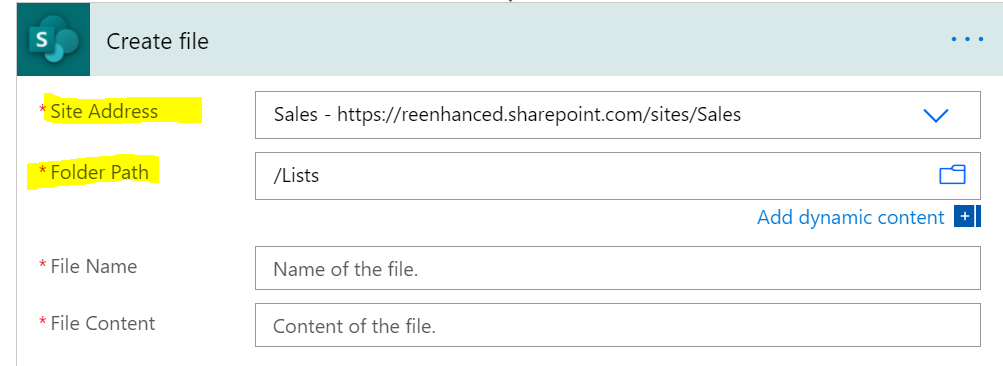
Below the HTTP action, add another action. Find the Action named Create File in the SharePoint connector. Then, select from your Site Addresses and specify a Folder Path:
Everything has been fairly simple up until now…. and now we need to call in an expert to assist with some expression writing. We want the File Name field in SharePoint to match the file name itself. With a little help from expression master Nick Hance at reenhanced, we are getting the file name and automatically mapping it into a SharePoint list.
So grab your handy developer and ask for some assistance in using your expressions! Here’s the detail of the expression we used in the File Name field in the SharePoint step. You can re-use this general format, but the triggerOutputs part is unique and dynamic to this flow.
last(split(triggerOutputs()?['body/15'], '/'))
The data comes from Gravity Forms as a string like https://www.reenhanced.com/file.txt. We use the split expression to turn that string into an array like [‘http:’,”,’www.reenhanced.com’, ‘file.txt’]. Then we use the last expression to grab only the last entry in the array, giving us file.txtfor the filename.
Need help building expressions in your flows? Check out this handy reference guide from Microsoft!
To build this yourself expression yourself:
- Click in File Name on the SharePoint action and then click the Expression button.
- Then, enter
last(split(and scroll down in the dynamic values list below the formula editor. - Select the file field from your Gravity Forms output
- Then enter
, '/'))to complete the expression
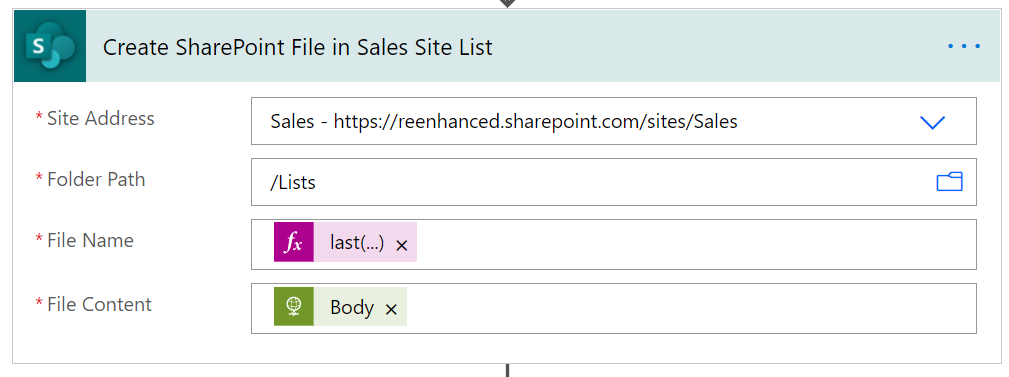
Finally, we need to pull in File Content from the HTTP action step above, so pull in the Body from Dynamic content. Your full SharePoint action should look like this:
Save, Run Flow Checker & Test!
Now that you have added all actions to this automated cloud flow, it’s time to Save, run the Flow Checker and Test your flow to make sure it’s working as expected! Happy building! If you have questions or need help, feel free to reach out and email me at [email protected].
Video Walk-through
If you’re a more visual learner and prefer YouTube videos, here’s a 6-minute video I made to demonstrate building this flow for WordPress and SharePoint:
Need a refresher on how to get started using Gravity Forms for Power Automate? Check out this YouTube video that has a complete walk-through on how to set up the connector in WordPress: