Applying the Editable Grid Control in Dynamics 365
Applying an editable grid custom control gives users the ability to add data directly in a view! Depending on your use cases and users, implementing this simple control can be a big time saver for data entry and large quantity updates without having to individually open each record. This control, like others in the UI, allow users to interact with an editable grid when using the web app, tablet or phone.
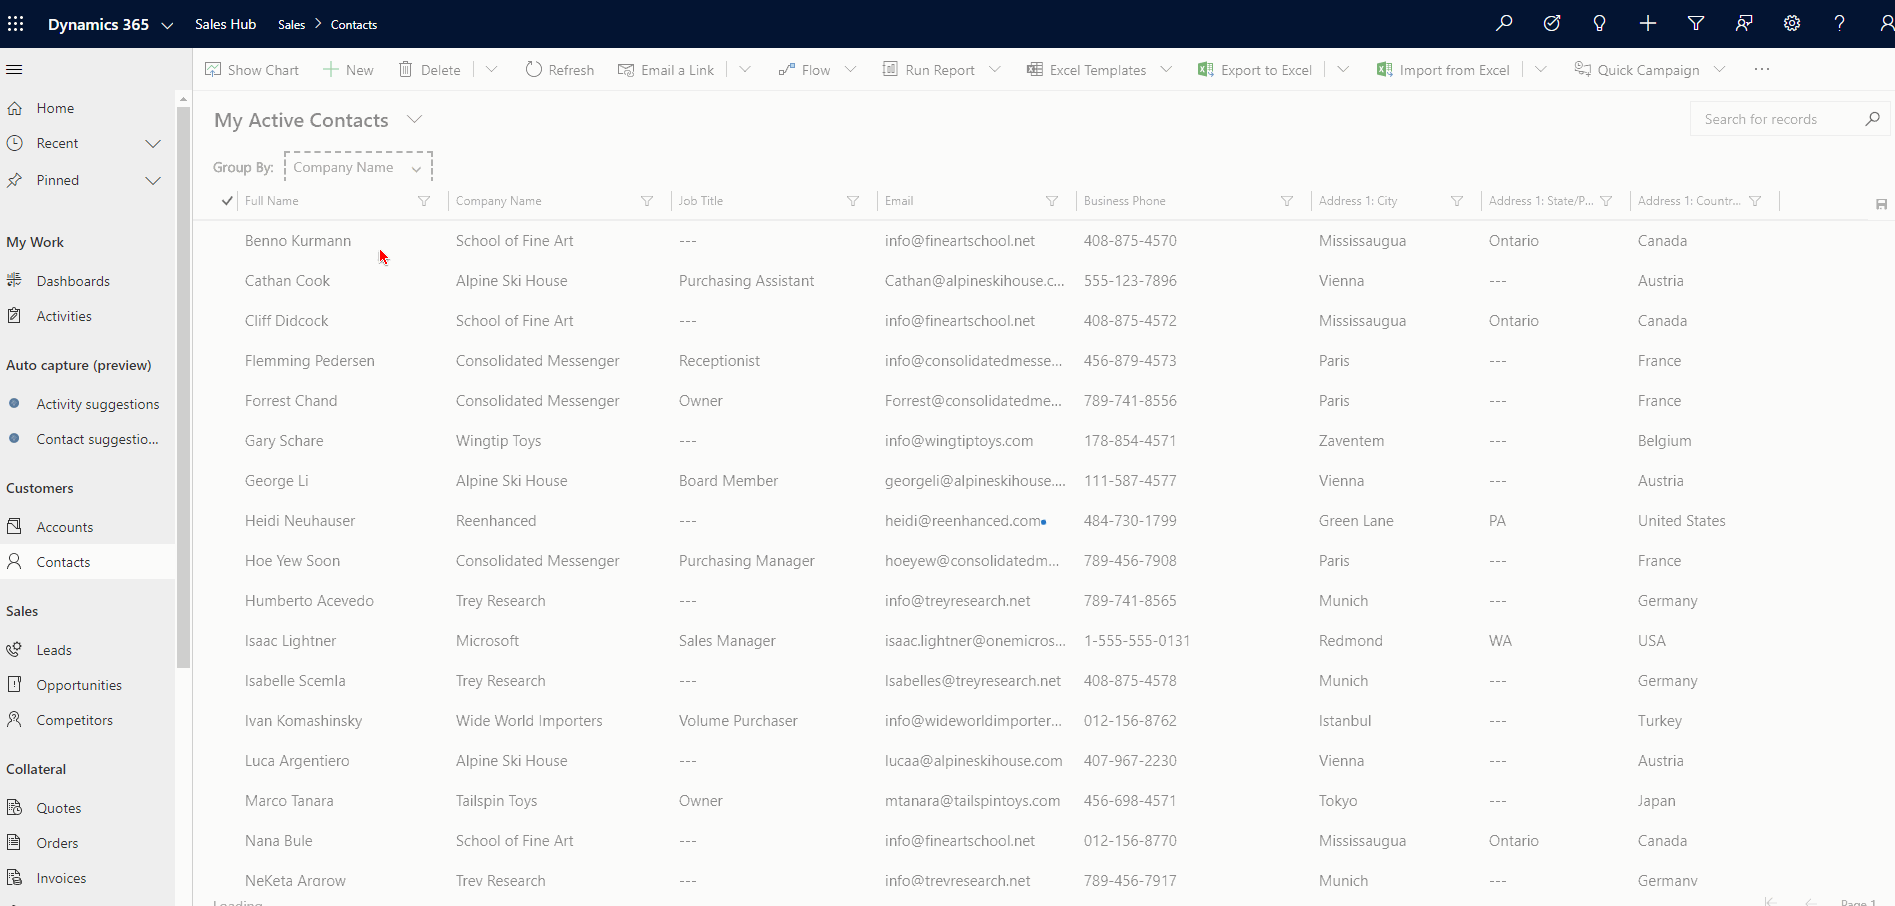
What does editable grid look like in action? Take a look at this GIF that shows you how simple it can be for an employee to make changes in an Editable Grid! In this example, the user groups all Active Contacts by Company Name, then makes updates to multiple records without ever leaving the view! So exciting and such a big win for user adoption! (Click the GIF below to enlarge and see more details.)
At this time (as of February 18, 2020), you’ll have to implement this custom control (and any others) in the classic solution designer.
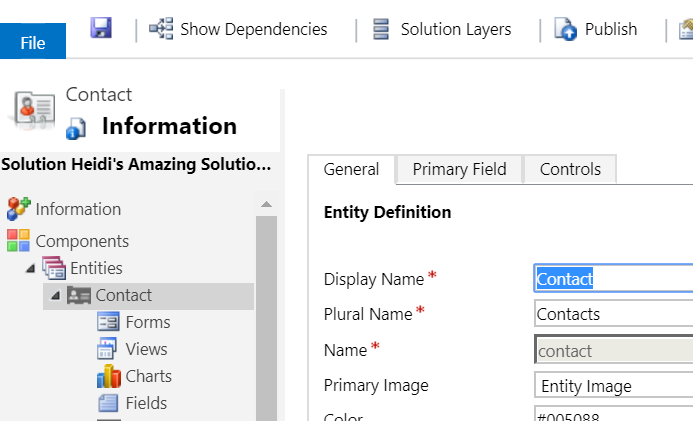
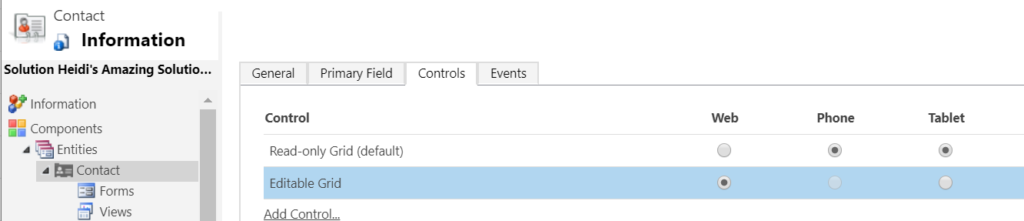
After you have added the Entity to your solution file, you will expand the entity (in this example, the Contact), then click the Controls tab.
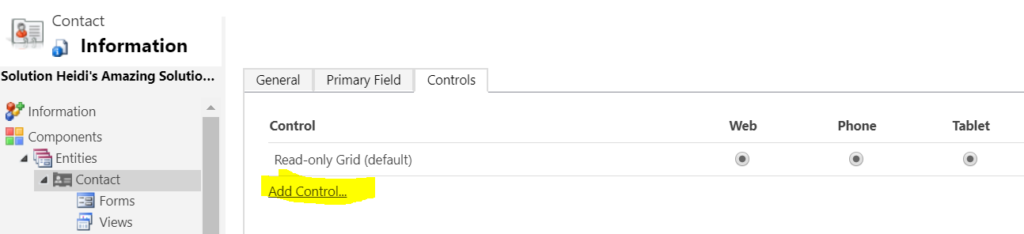
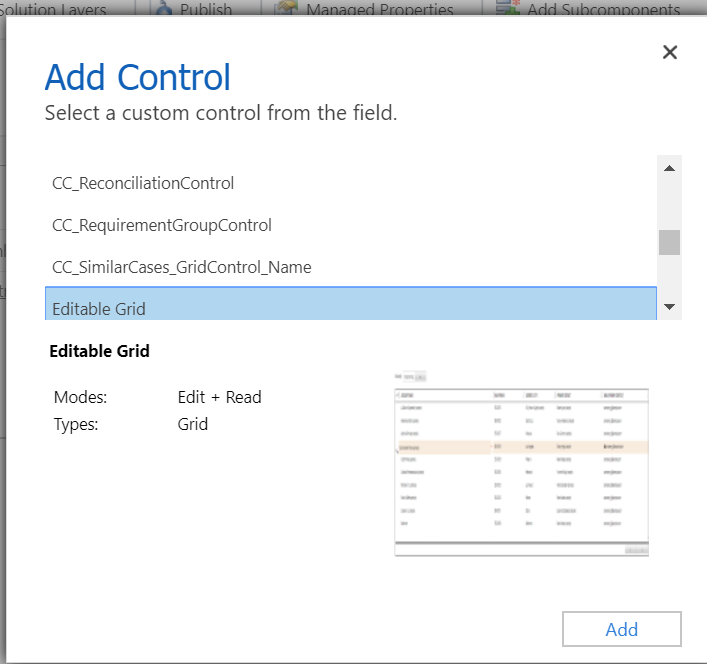
On the Controls tab, click Add Control…
In the Add Control window, scroll down and select Editable Grid (and notice all of the other fun controls available the entity level!)
Now, the control has been added to the Entity, but by default is not enabled. Select Editable Grid on Web, Phone and/or Tablet, based on your business and end user requirements.
Finally, click the Save icon at the top and it will update your entity. Publishing it will make it live in your Sandbox where you can set your users loose and let them start testing!
With all features available in Dynamics 365, I like to point out any limitations I’ve found or read about. Here are a few – let me know if you’d found others!