Using Power Automate’s Flow Templates
Are you new or newer to building Flows in Power Automate? If so, using a flow template be an excellent option. Here, we walk you through how get started with flow in Power Automate using a template. This blog originally appeared at www.crmheidi.com.
Get started quickly with building your Flow by using a Power Automate template. Templates are pre-packaged flows that get you up and running quickly. They use popular use cases and save you loads of time versus building the same thing from scratch. Take a look at the full list of available templates here (more are added every week!).
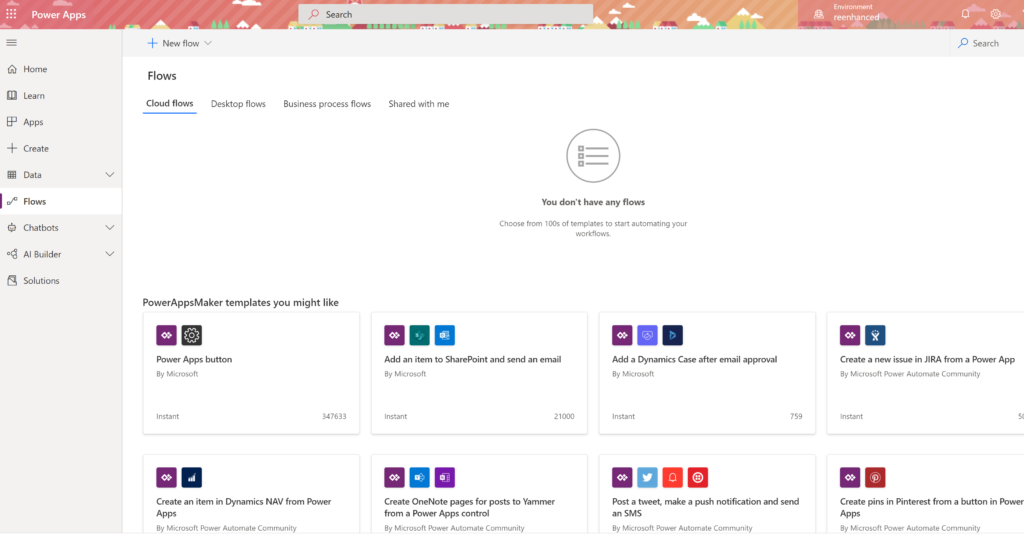
From make.powerapps.com, click the Flows area on the left-hand navigation pane. In this area, you will find PowerAppMaker templates you might like. Browse these or use the above link to see all templates.
Anatomy of a Flow Template
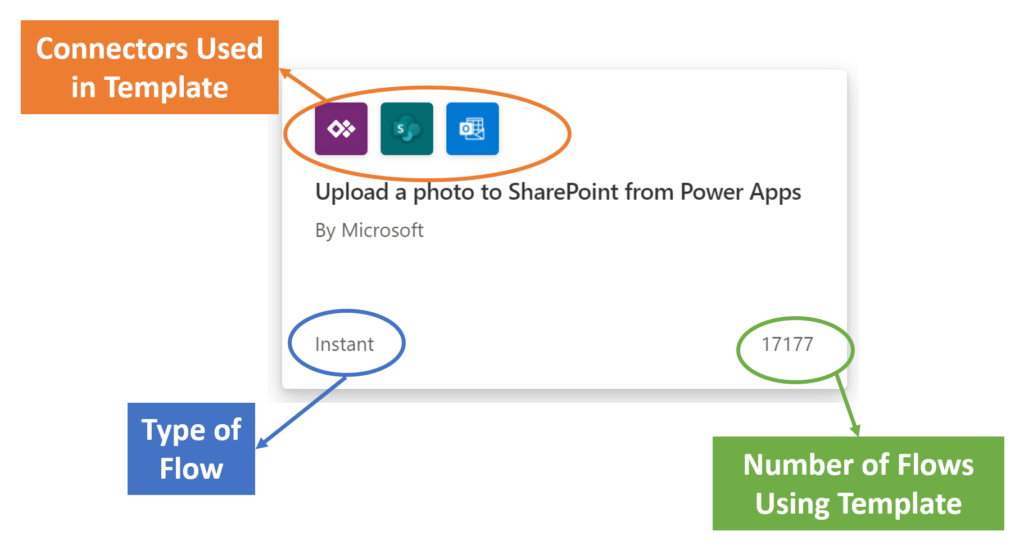
When you see the boxes with each template, you will notice a few things:
- There are icons across the top. These icons are the connectors used within the template.
- There is a bold title of what the template does.
- Under the title, it tells you the author of the template.
- In the bottom right-hand corner, there is a number. This tells you how many flows are using this template.
- In the bottom left-hand corner, it will tell you what type of flow this template is: Instant, Automated or Scheduled.
Template Details
Once you click on a template box, you will see the template details. The details displayed will vary with each template, but here is an example:
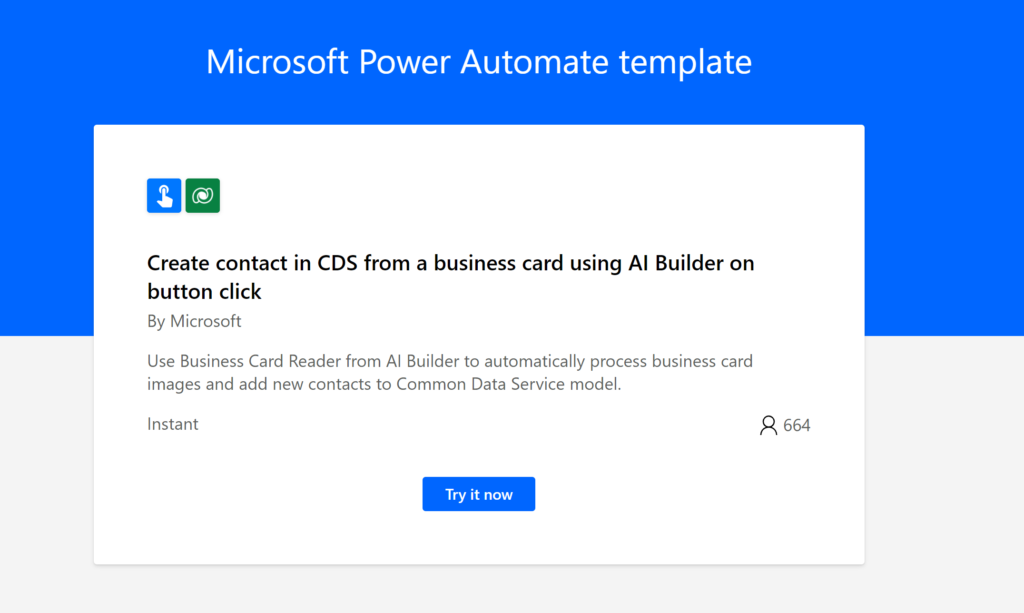
Click the Try it now button to launch the template and get started customizing the flow for you and your organization!
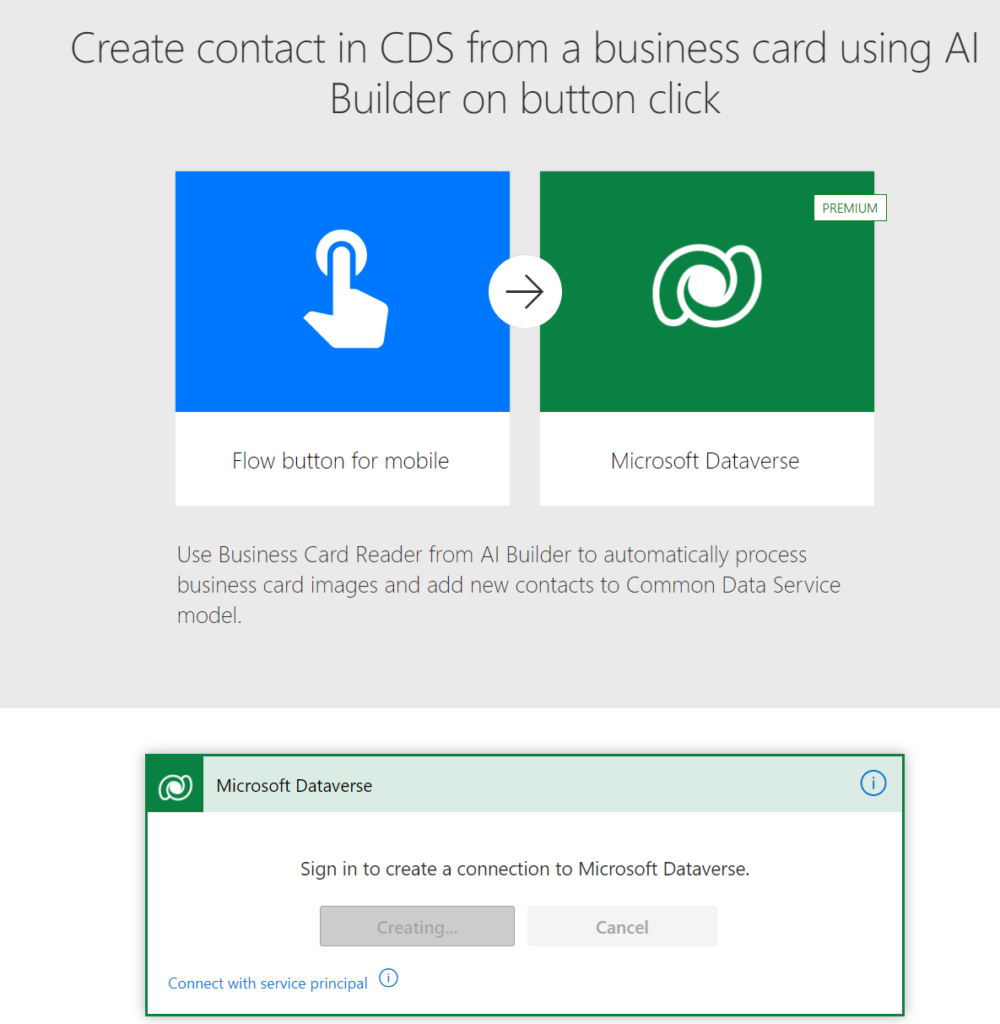
Authenticate & Add Credentials for Connectors
Depending on the connectors, you may first be prompted to authenticate for each – enter your log in information.
Flow Canvas
Once you have completed connector authentication, your flow canvas will fill with the template. Make any changes and additions to the template, then test it out and play! Note: If any of the triggers or actions use dynamic values in your templates, you may need to update them in subsequent steps.
For example in this specific template below, if you change “input business card” to something else, you can’t depend on it for the Image attribute in the Predict box. Make sure you update fields if you make changes!
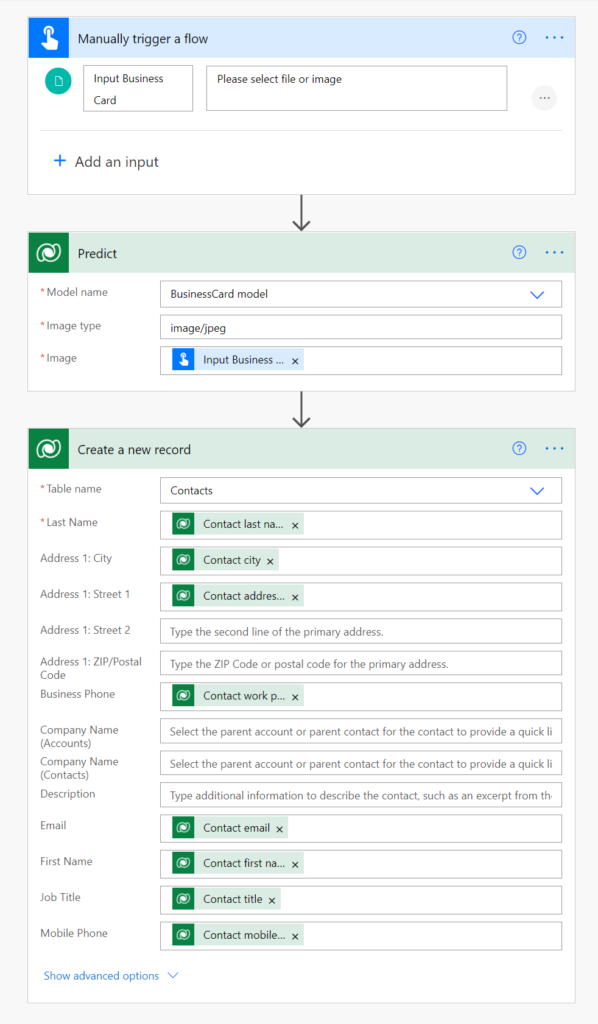
Save your flow, then test it.
The Complete Flow 101 Series at CRMHeidi
- An overview for the absolute beginner
- Building an automated cloud flow
- Creating an instant cloud flow
- Making a scheduled cloud flow
- Working with Power Automate templates

