Upload multiple files to Power Automate with Gravity Forms!
By now you have probably built a few amazing flows in Power Automate to connect your Gravity Forms field submissions and you’re probably wondering “What if my users want to upload multiple files to the same form?”
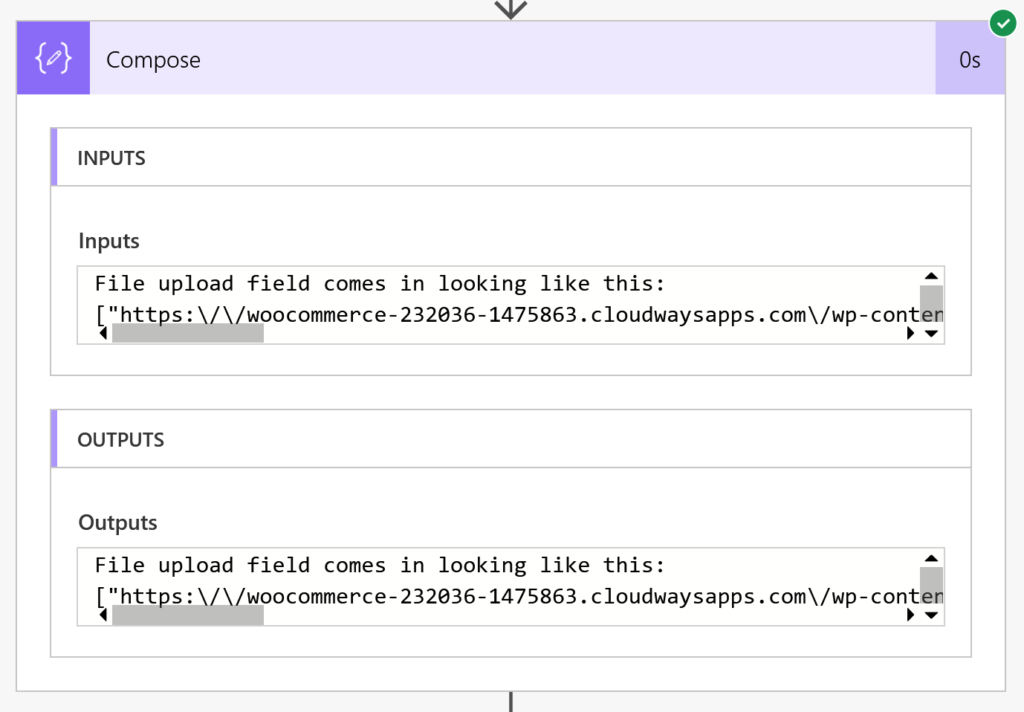
Why does my file upload field look weird in Power Automate?
Until now, our official guidance has been to make sure that the “Enable Multi-File Upload” box wasn’t checked.
But what kind of flow author would you be if you can’t build a flow to work the way you want? The real Power™ of what we do with our flows is that we have ultimate freedom to build our flows however we want, right?
It turns out, you can use the checkbox. Here’s how to make it work.
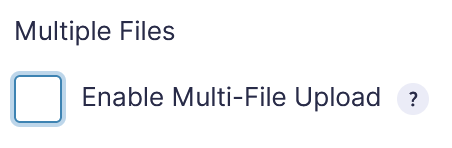
Step 1: Enable Multi-File Upload
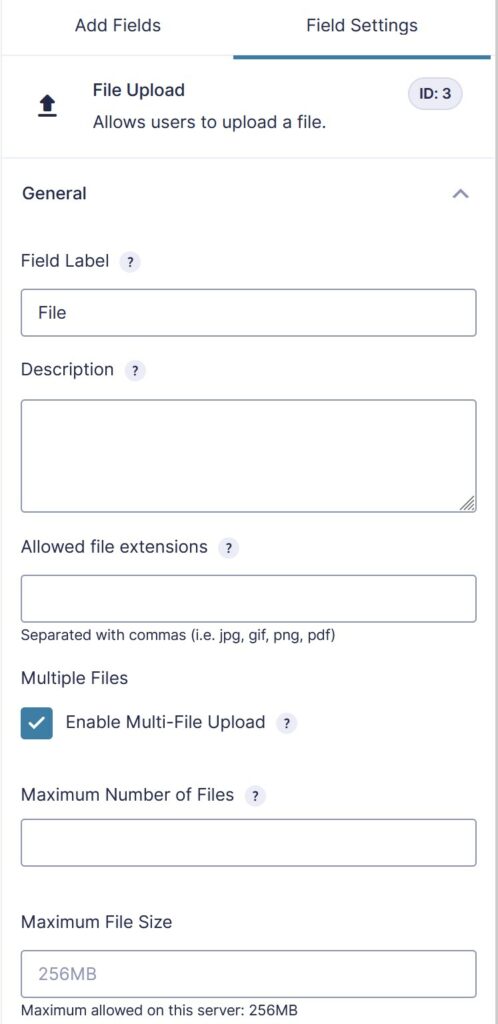
In order to send the files to Power Automate, you’re going to need to add or edit an existing field for File Upload inside the Form > Edit area in your WordPress Admin.
Once you’ve found or added the field, just scroll down in the Field Settings until you see the checkbox labeled Multiple Files.
Then, check the box like you see in the image and press Save Form.
This will send your form’s metadata to our server so that the new field will be available for you in the Power Automate flow editor.
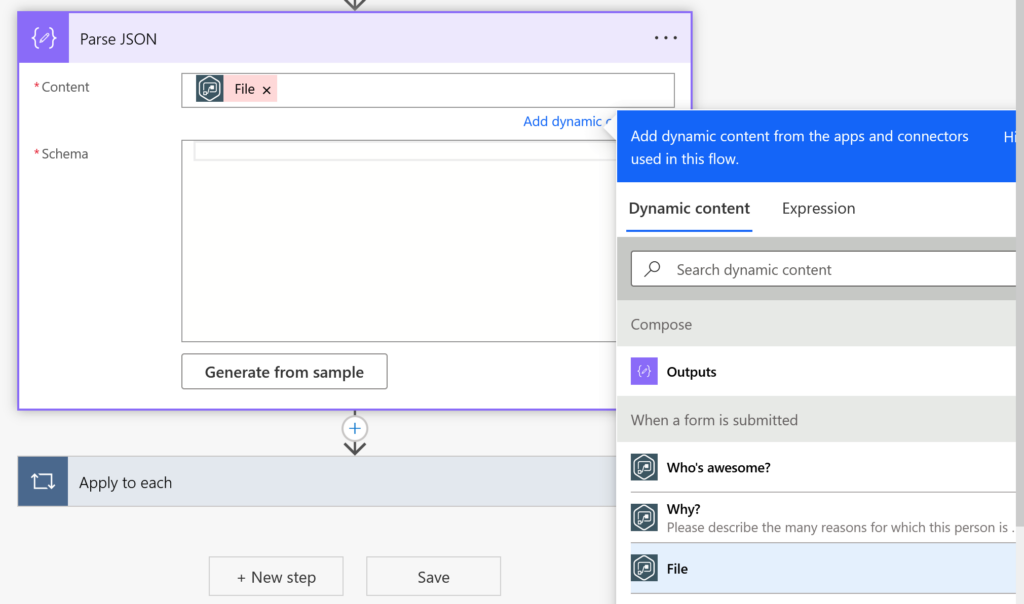
Step 2: Parse the incoming File field
Next, go to Power Automate and edit the flow that will receive the files. For each field where you have “Multi-File Upload” enabled, you’re going to need to repeat this step, even if the user only uploads a single file. In other words, once you enable Multi-File Upload, you need to parse the incoming data before you can use the field.
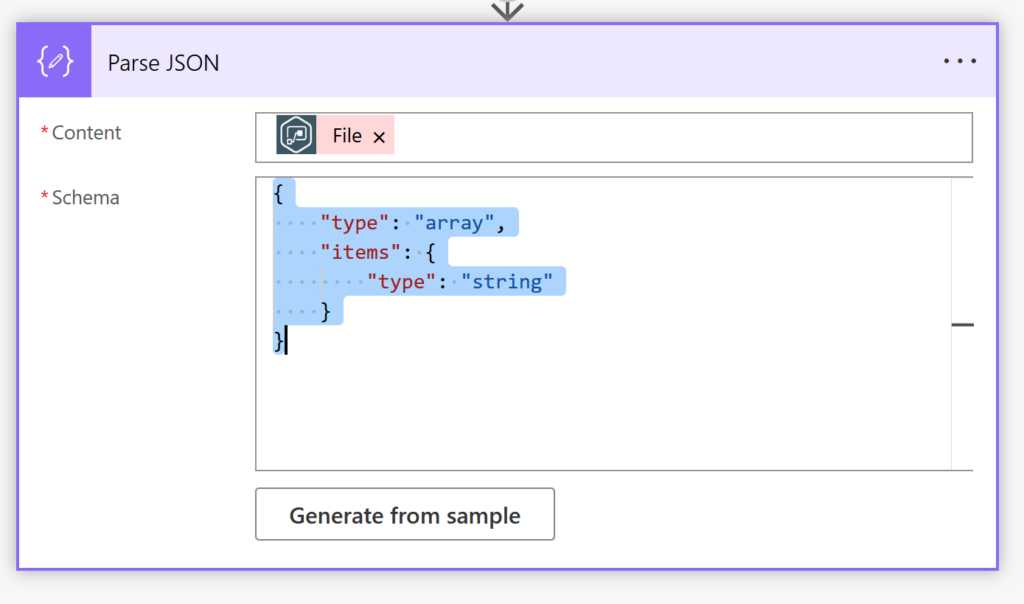
Add a new step with the action called Parse JSON and select the File field from your form as the Content for the step.
Our goal with this step is going to take the string that comes from Gravity Forms and turn it into an array of URLs that we can use in future steps. In order to do that, we need to tell Power Automate what sort of data we expect to see in the File field. To do that, we need to use Schema to describe the data.
We’ll use the Generate from sample button and make our lives easier. This button takes an example of what the data looks like and builds a schema that Power Automate uses to understand the format of the data.
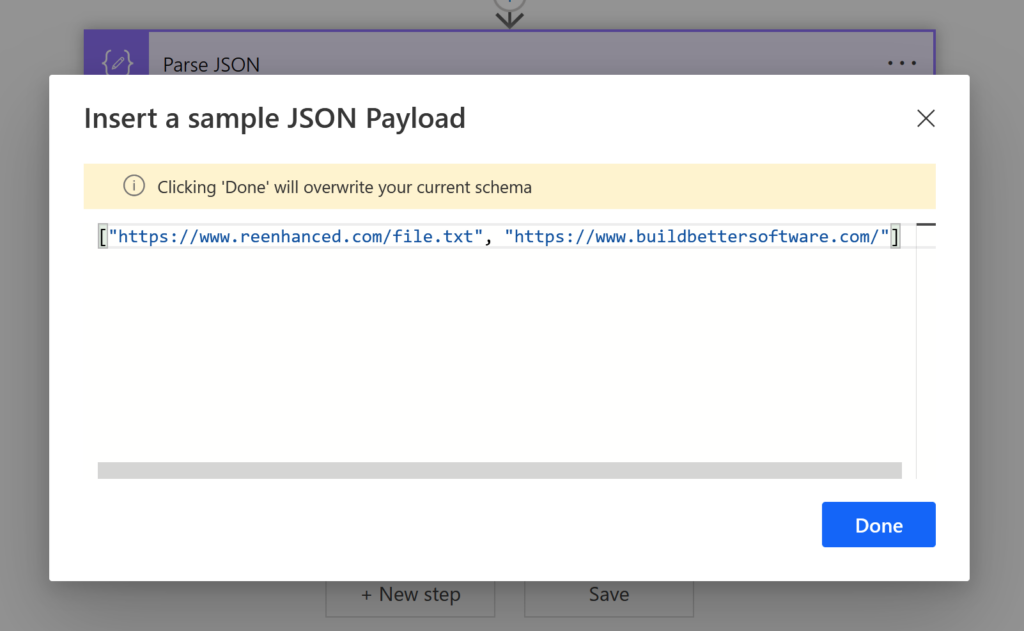
Once you see the Insert a sample JSON Payload window, enter some text like the following into the box. You can use your own URLs if you have your own favorites, it doesn’t matter.
["https://www.reenhanced.com/file.txt", "https://www.buildbettersoftware.com/", "https://www.connectorreview.com/"](If you use the text above, copy EVERYTHING including the square brackets on each end.)
Once you click Done you’ll see the Schema is generated and looks like the following.
Step 3: Use the outputs of Parse JSON to access the files
Once you’ve completed the step above, you’re done and can start to access all of the URLs for the uploaded files. Using them is as simple as selecting Item from the Parse JSON step in the Dynamic content area.
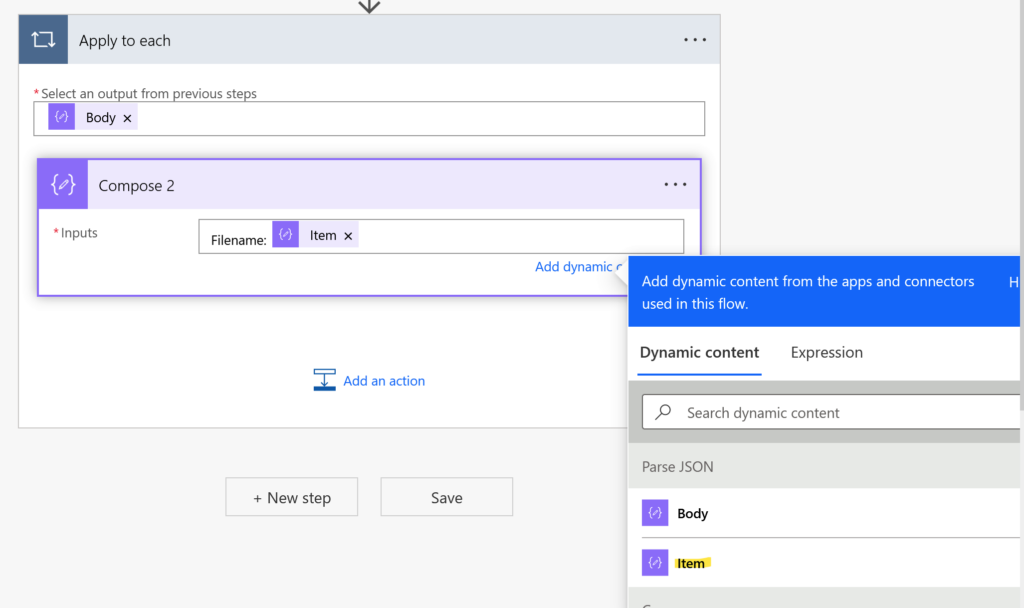
One thing to remember is that even if your user uploads only a single file, Power Automate won’t know that in advance so it will treat every flow as as a list containing a single item.
Finally, if the user does not upload any files, then the entire Apply to each loop will be skipped because your list of files won’t contain any items.
Happy Crafting my friends!