Setting up the Linear Slider UI Control in Dynamics 365
When it comes to field controls available in Dynamics 365, System Administrators have their pick of custom controls ! We’ve blogged quite a bit about UI controls and thought it would be great to continue with other controls. Today, we take a look at the simple steps to set up a linear slider UI control.
The linear slider is a great custom control that can be used to visually set a numeric field.

You can use this control on several field types on a form: whole number, decimal, currency or floating point number. It’s a great way to give your users the ability to visually set a number field instead of typing into it.
This control (unlike others) can be configured at either make.powerapps.com OR by using the Classic Solution Designer.
Steps for Online Customers
1. Go to make.powerapps.com, head over to a Solution file you’ve already created, and open the Form where you want to apply the control.
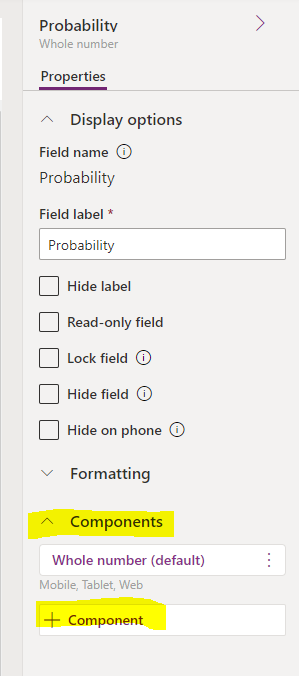
2. Click on the field that will convert from a number to the Linear slider.
3. On the right-hand panel that expands, click Components and then click the + Component button:
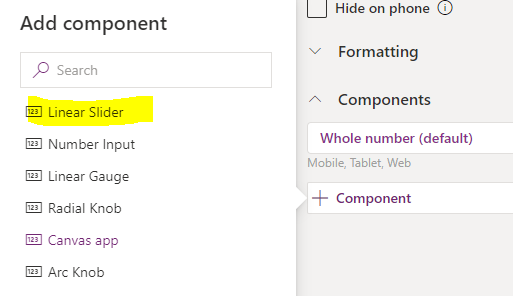
4. All controls available in the maker experience will show up. In this example, select Linear Slider.
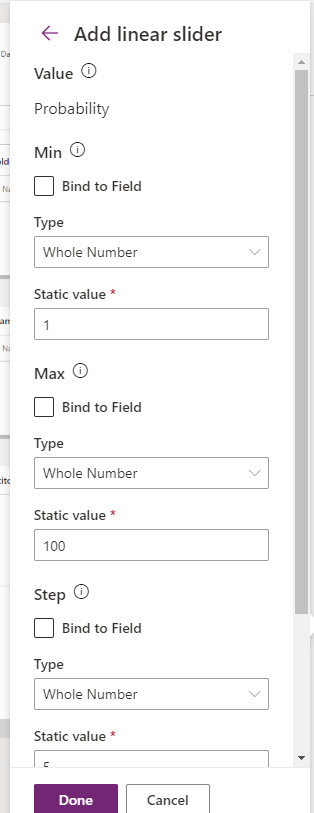
5. Next, you need to configure the Min, Max, Step values. Here, we are updating probability, so we will set a Min of 1 and a Max of 100 with a Step of 5.
6. Confirm scope (showing the component on Web, Mobile, and/or Tablet), then click Done.
7. Finally, Save & Publish your changes!
Steps for On Premise Customers
1. From the Classic Solution Designer, open your Entity.
2. Open the Form on the Entity.
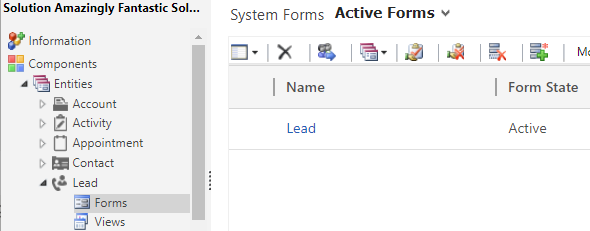
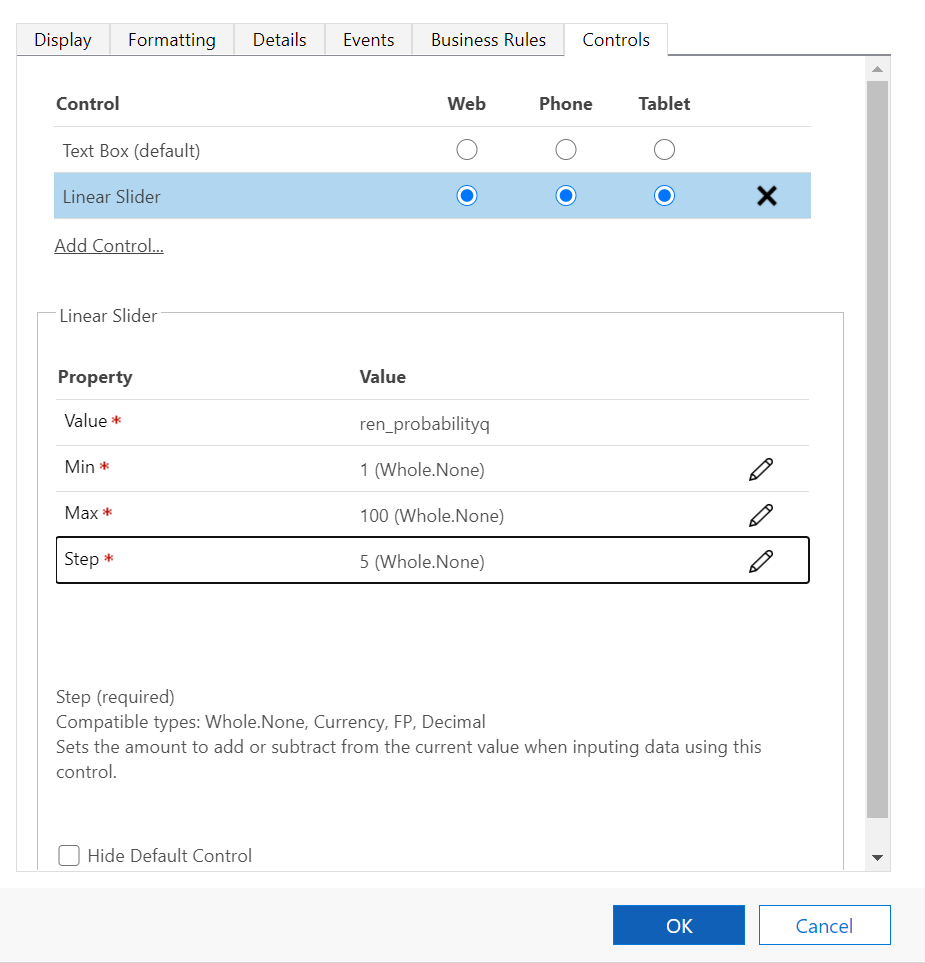
3. From the Form designer, open the field you want to apply a custom control on (in this example, we will use Probability on the Lead).
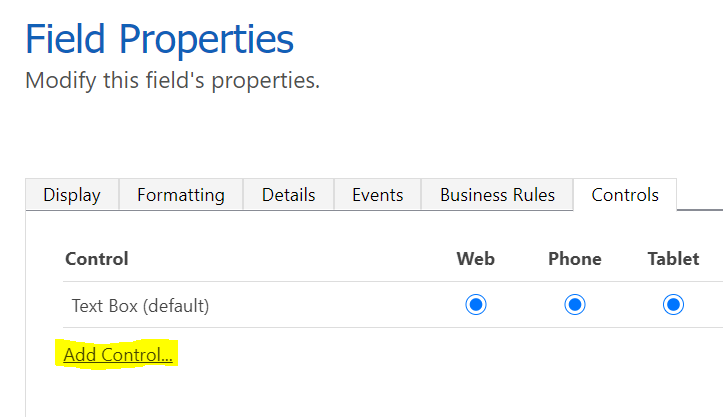
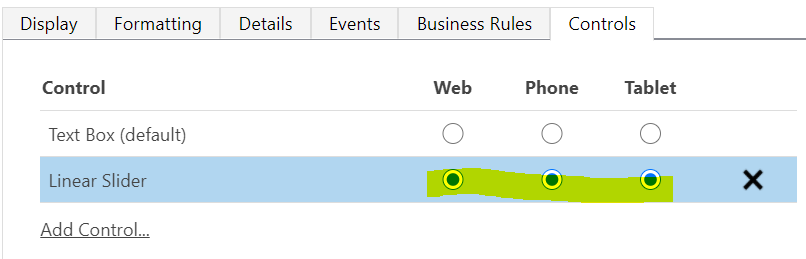
4. Click the Controls tab, then click Add Control… (highlighted below).
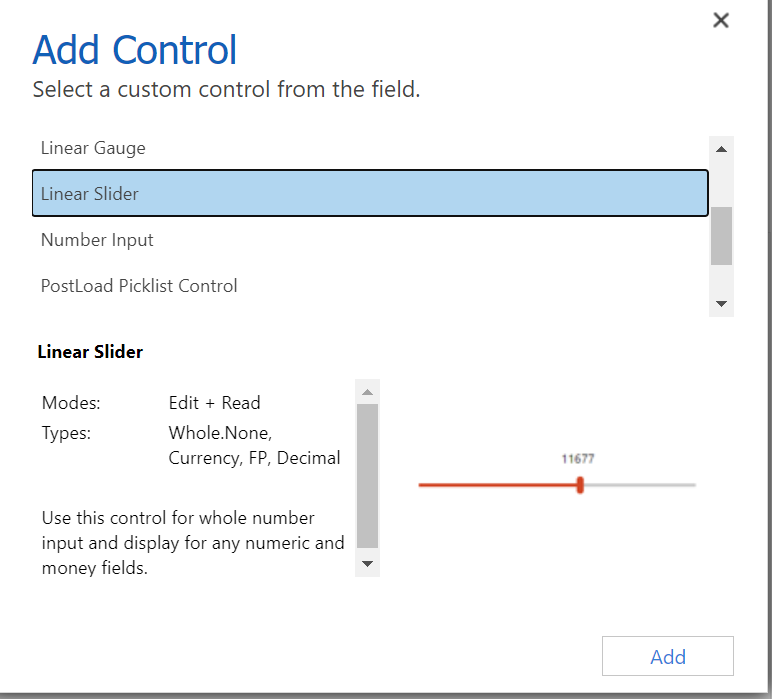
5. Select Linear Slider from the list that appears in a popup window, then click Add.
6. Set your Scope by selecting Web, Phone and/or Tablet from where you’d like this control to appear.
7. Below the Scope, you need to configure Min, Max and Step. First, click the pencil icon next to Min.

8. In the new window that opens, you will Set the minimum number on your slider (in this example, we want it to be 1). Select the option to Bind to a static value then enter your value. Click OK.
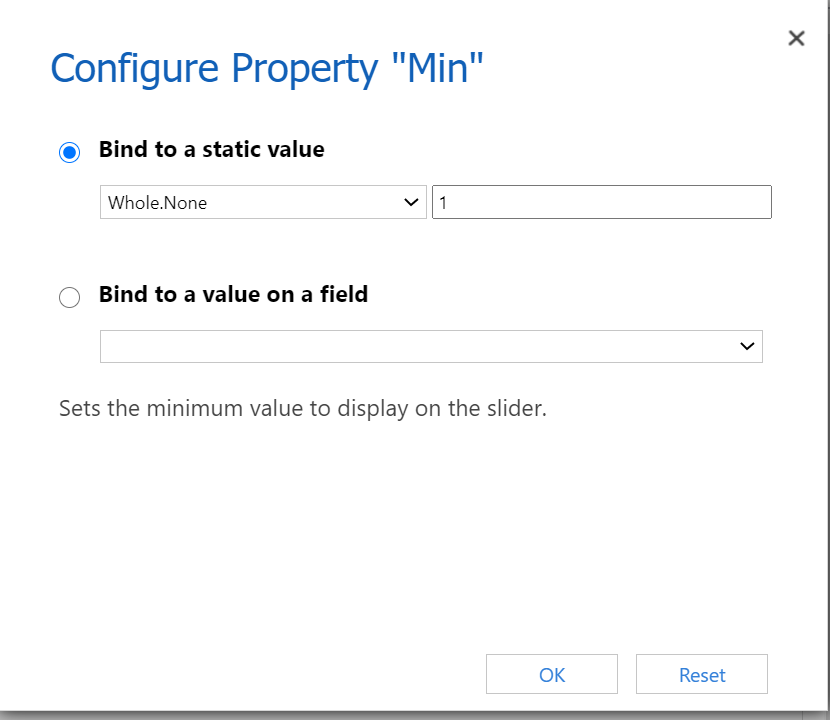
9. Repeat steps 7 & 8 for Max.
10. Repeat steps 7 & 8 for Step, this time selecting the increment for each move upon the slider.
11. Back on the Field Properties box, click OK at the bottom.
12. This takes you back to the Form editor. Save your changes then Publish.
I hope this helps you with configuring the Linear Slider control on a field in Dynamics 365. If you try this out and need some help, feel free to reach out to me. You can fill out our Contact Form with details about what you’re working on, or email me directly at [email protected].